Introduction: World First Wi-Fi RGB Camera Grip
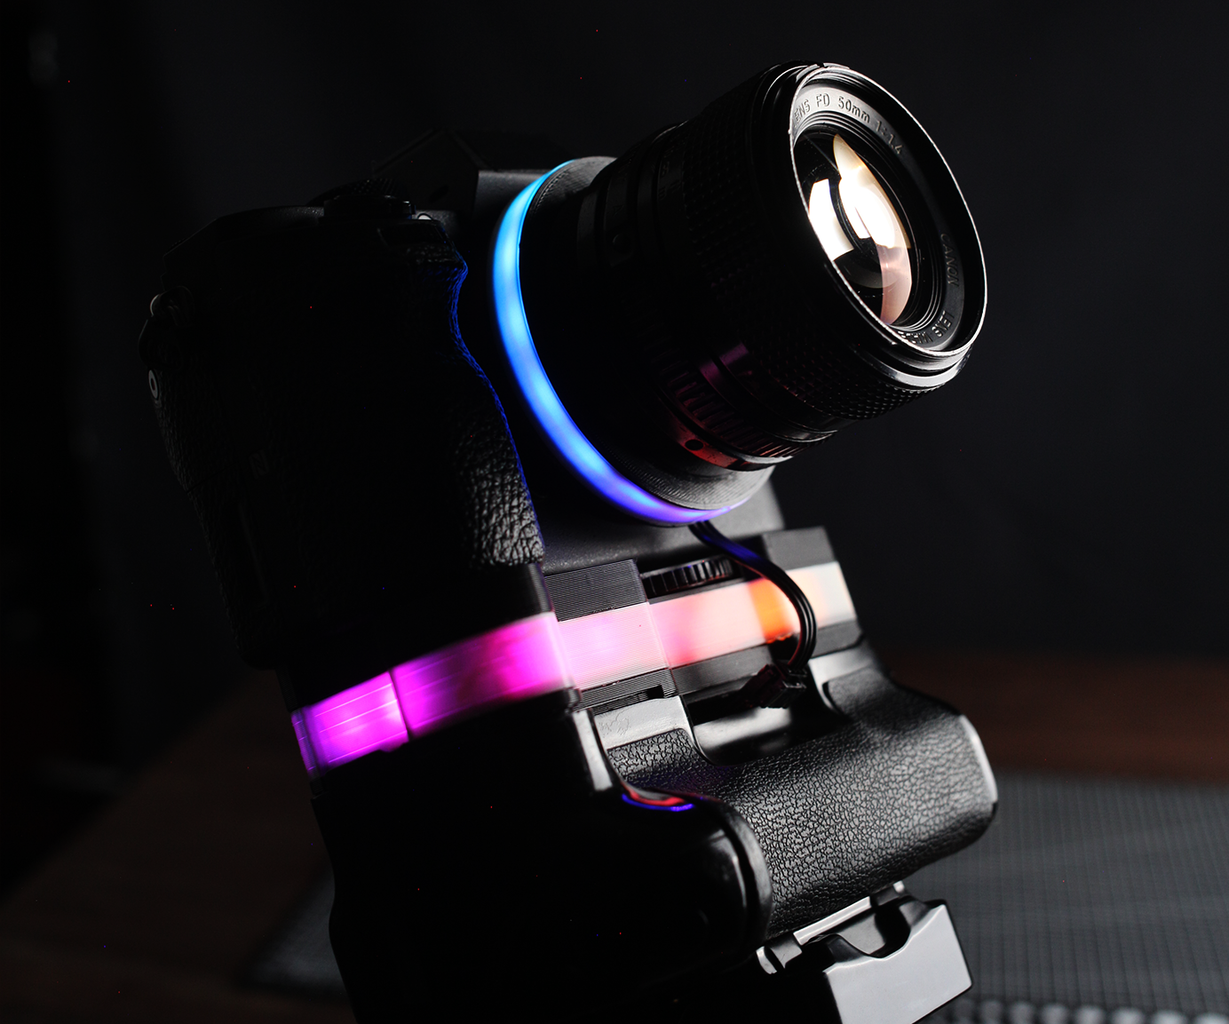


This is the world first and unique RGB Camera Grip!
In a world where every object can be RGB like PC, Keyboard, Mouse, Chair, Headphones, Mousepad, Fans, Bulbs, Power cables, etc. Why not your camera?
And everybody knows that with RGB you have more FPS! (just kidding)
Also this battery grip have an extra feature... (that's the reason to use a Rpi Zero instead of a ESP8266)
Supplies
- Old cheap camera grip to disassemble.
- 2 x 18650 batteries and holder.
- Raspberry Pi Zero and SDcard.
- WS2812b LED strip.
- DC-DC buck converter.
Step 1: Design the Grip
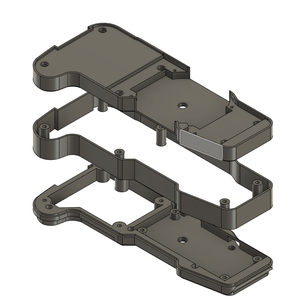
In order to modify your grip you have to disassemble the grip most grips have screw over and the top plate can be lifted up and create an space where to introduce the Raspberry Zero the LED strip and the DC-DC power converter.
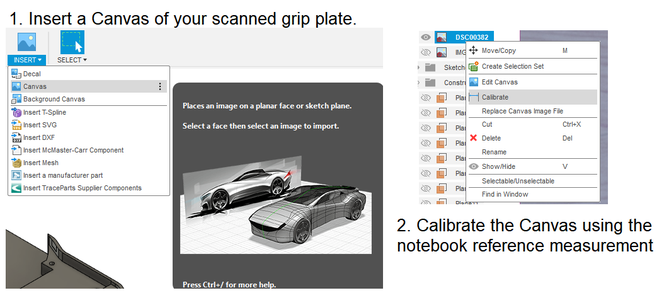
To easy design this separation you can take a picture of your grip using a telephoto lens to avoid distortion and a ruler or a notebook to have a reference of measurement.
Now you can enter this photo into Fusion360 as a canvas, and recalibrate the canvas to have the measurement.
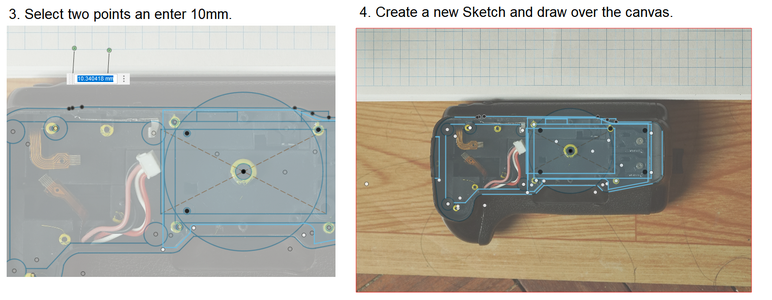
My notebook has a grid of 10mm so I will use two points of the grid as reference and enter 10mm to calibrate the canvas.
You can start drawing a sketch over the canvas and replicate the screw holes, create the new space for the RGB parts and the holes for the Rpi Zero. This power will be useful to connect the camera to the Rpi Zero and program the Rpi Zero.


Step 2: Connect the Power
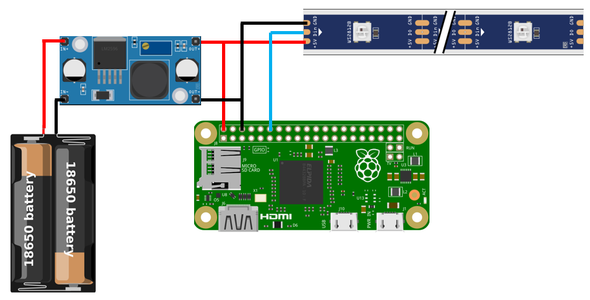
The Rpi Zero and LEDs doesn't draw to much power so a pair of 18650 batteries or your camera batteries will work.
Note: I am using an old Canon Camera Grip to use it with my Sony Camera. But if you want to use your regular battery grip compatible with your camera you can use your regular batteries as they have and output of 7.4V the same as a pair of 18650 batteries.
Connect the batteries to the DC-DC power converter.
Note: Very important! Setup the Power converter to 5V before you plug the RPi and LED Strip.
Connect the DC-DC converter to the RPi and LED Strip.
and it is done.
Note: It is important to use a BMS (Battery Management System) to avoid damaging the batteries. This can go between the batteries and the DC-DC converter.
I used the power button of the old grip to power on and off the DC-DC converter.
Note: The Grip I used is a pretty simple grip only connect the buttons and batteries to the battery pins inside the camera, other kind of grips can have a more complex PCB inside. So I recommend using a cheap grip if you will buy one new.
Step 3: Program It
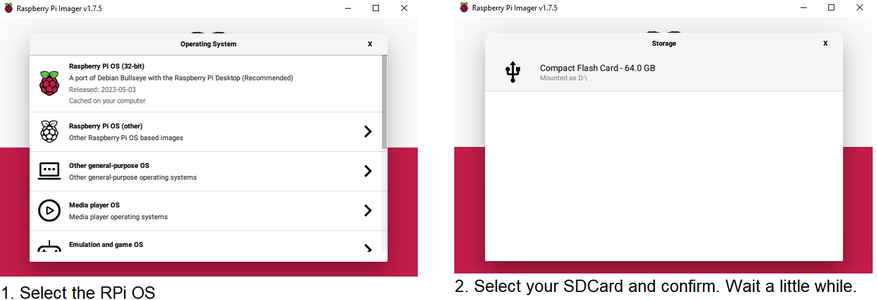
First you will need to copy the ISO image of Raspbian into a SD card, you can use Raspberry Pi Imager.
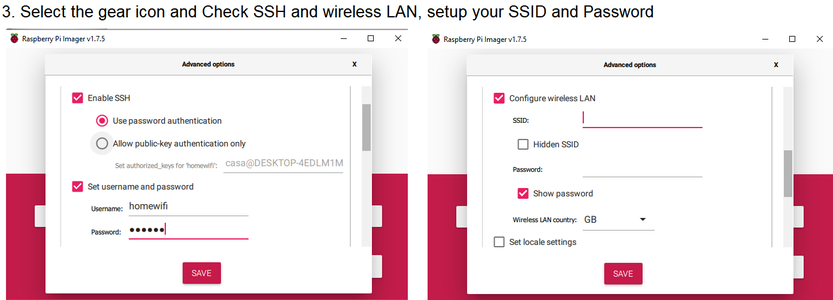
In the Raspberry Pi Imager you can Setup the SSID and Password, you can connect later using SSH or you can use a monitor and a keyboard with a USB-A to Micro USB adapter.
Copy the files of the project into the home folder.
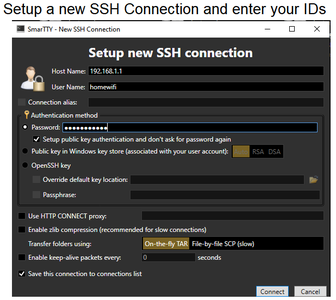
Now you can enter into an SSH session from your phone using an SSH Client.
To enter an SSH session you can use SmarTTY is a software easy to use, you have to enter the IP address of the RPi Zero, the user and the password.
Run the next command to pick a color
sudo python3 onecolor.py 255 128 0
You have to choose 3 numbers that represents the R, G, and B values. In the example R=255 G=128 B=0
Run the next command to play the rainbow effect
sudo python3 pixels.py
Run the next command to start the Wireless Tethering Note: First setup the shared folder for this.
sudo python3 wireless.py
Once you finish with the wireless tethering process you can press ctrl+c to finish. and Exit the SSH session.
I will update the scripts on a more automated version. So bookmark this tutorial.

Step 4: Setup the Shared Folder.
To enable a shared folder in Windows, first create a folder where the photos will be stored.
Right click on the folder and select "Give access to" and "Specific People", select your user and click on Share
Enter your "Network and Sharing Center" and enter "Change advanced sharing settings".
Turn on "Network discovery" and "file and printer sharing".
Once this step is done, you can go inside a SSH session and enter the next commands
mkdir ~/WindowsShare
This will create a folder where we will link our shared folder.
sudo mount.cifs //<address-of-windows-pc>/MySharedFolder ~/WindowsShare/ -o user=<Windows-user>,uid=$UID
Before executing the command you have to change some parameters the address is your IP of your computer, and the Folder name has to be the same as your folder shared before. and the Windows User must be your login ID of your computer. Like the next line:
sudo mount.cifs //192.168.1.2/tetherf ~/WindowsShare/ -o user=homepc,uid=$UID
My PC is called homepc and the folder I created is tetherf.
Once this steps are done, you can run the wireless.py file and open in your PC your favorite Photo Editing Software, Lightroom and Capture One have auto import option so you can see the files shared directly to your software.
Step 5: Connecting the Camera to the Rpi Zero
One important step, the RPi zero can power some devices but some cameras have the option of charging the camera via USB, disable this option before connecting the camera to the RPi Zero because this can damaged the RPi.

This is an entry in the
Colors of the Rainbow Contest


2 Comments
2 days ago
Wow, that impreassive. I would like to buy it. JcPenney
3 days ago
that is best idea but it is expensies.