
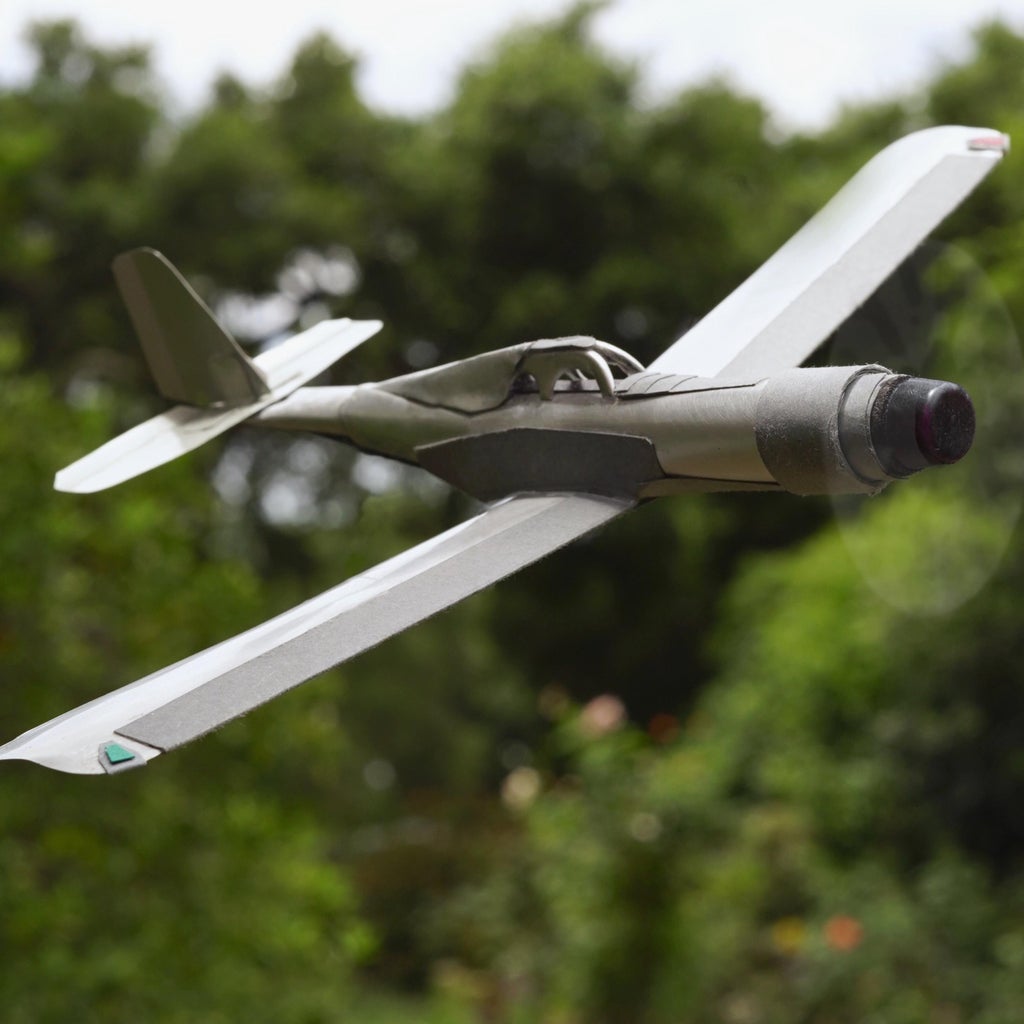
Introduction: Soda Can Aluminum Chuck Glider
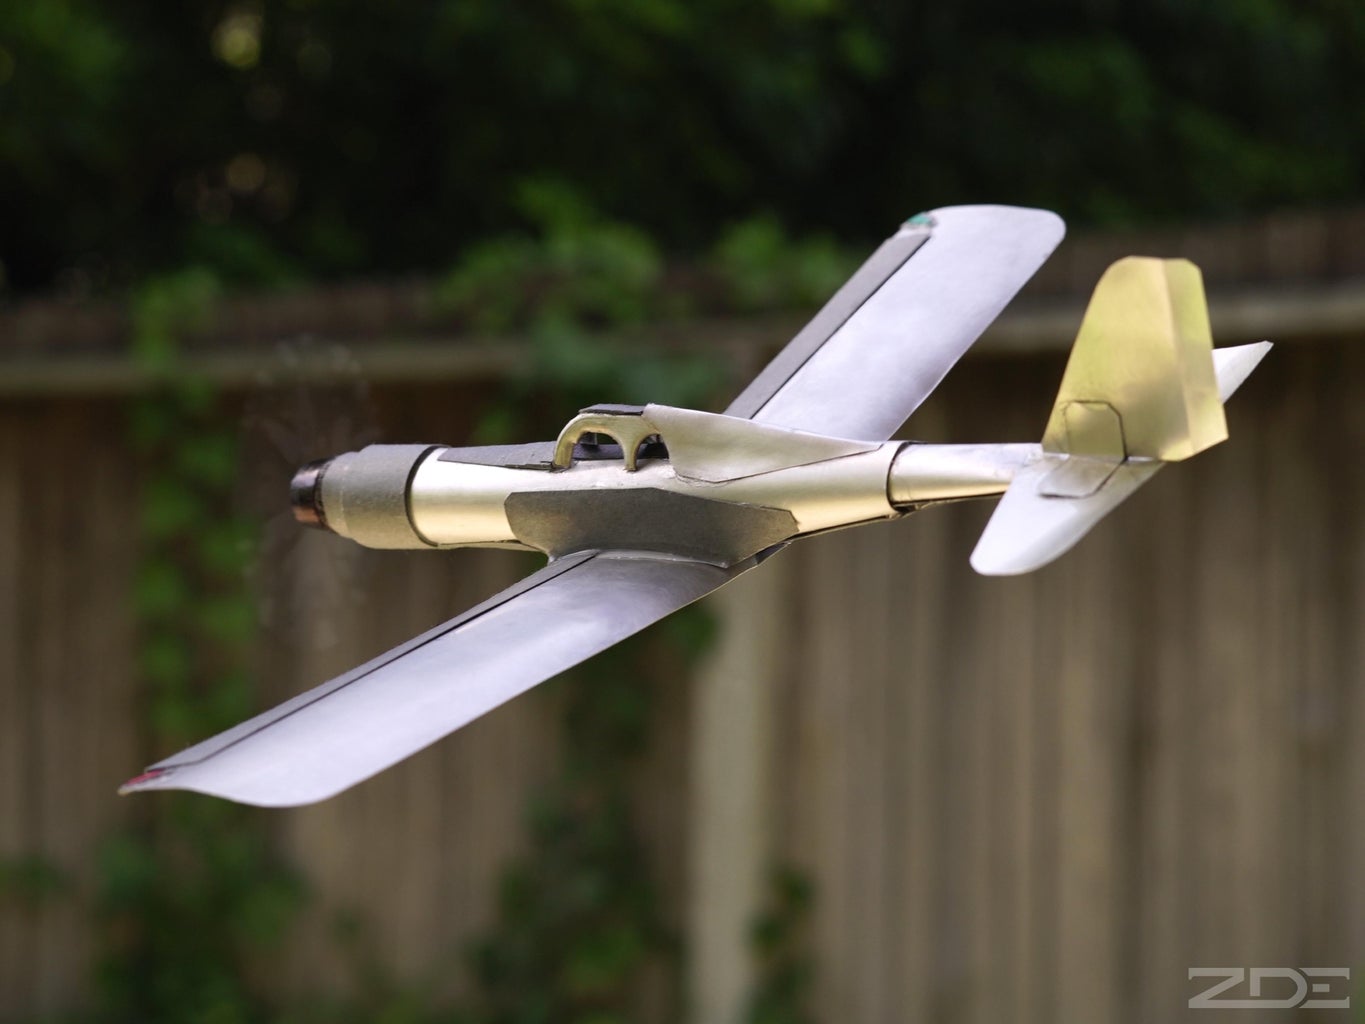


I recently watched some videos of robots, vehicles, and other intricate models being made out of soda cans by Minimaus Crafts. That led me to consider trying out the material for a new glider design.
There is risk of injury when working with this material. Be careful, especially when cutting open the cans. If you're a young person, get help from an adult. You can reduce the risk of injury by...
- making sure your scissor cuts are long and clean, leaving no ragged edges or barbs.
- lightly sanding edges with fine-grit paper.
- designing wings and stabilizers with rounded corners.
- working slowly.
Supplies
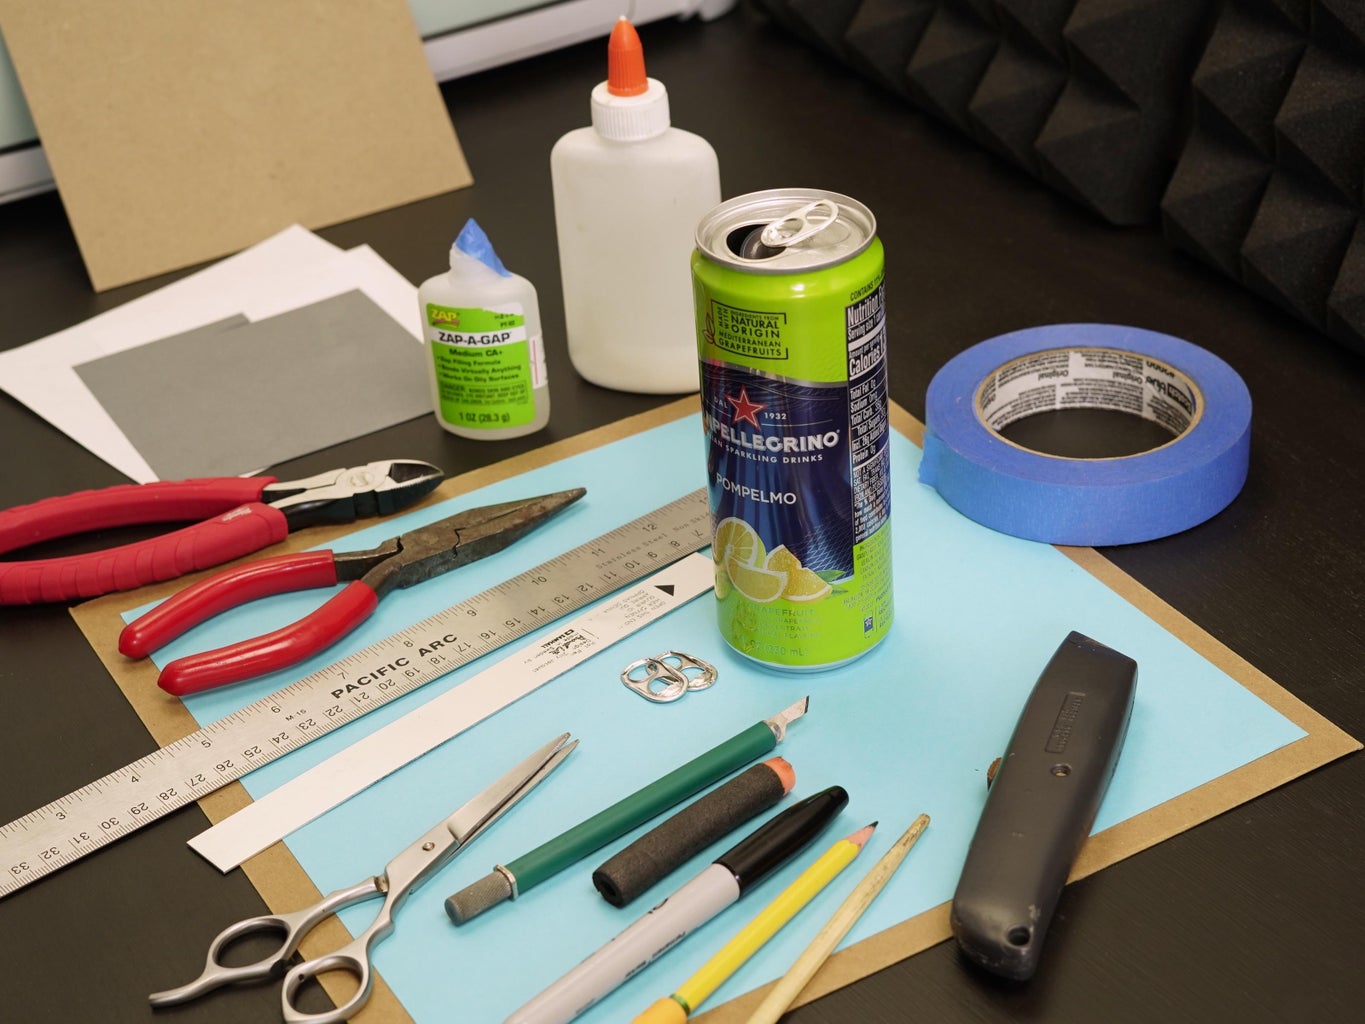
- two soda cans, one of which should be taller than standard (see picture) to fit the wings
- sheet of card stock; I recommend grey, 65 lb. / 175 gsm
- scrap card stock or paper
- sand paper, 220 or finer
- aluminum polish, rag, and gloves (optional)
- masking tape
- CA glue and PVA glue
- needle-nose pliers
- metal snips (optional)
- ruler
- scissors
- hobby knife
- Nerf dart, or kneaded eraser or modeling clay
- black permanent marker
Step 1: Prepare Cans
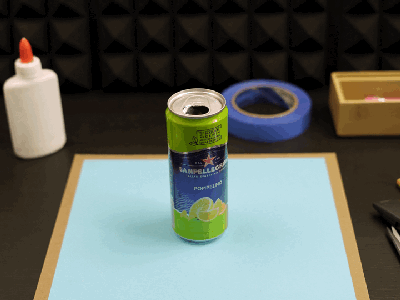
I figured bare metal would look best, so I wet sanded the cans and used a liquid polish on them.
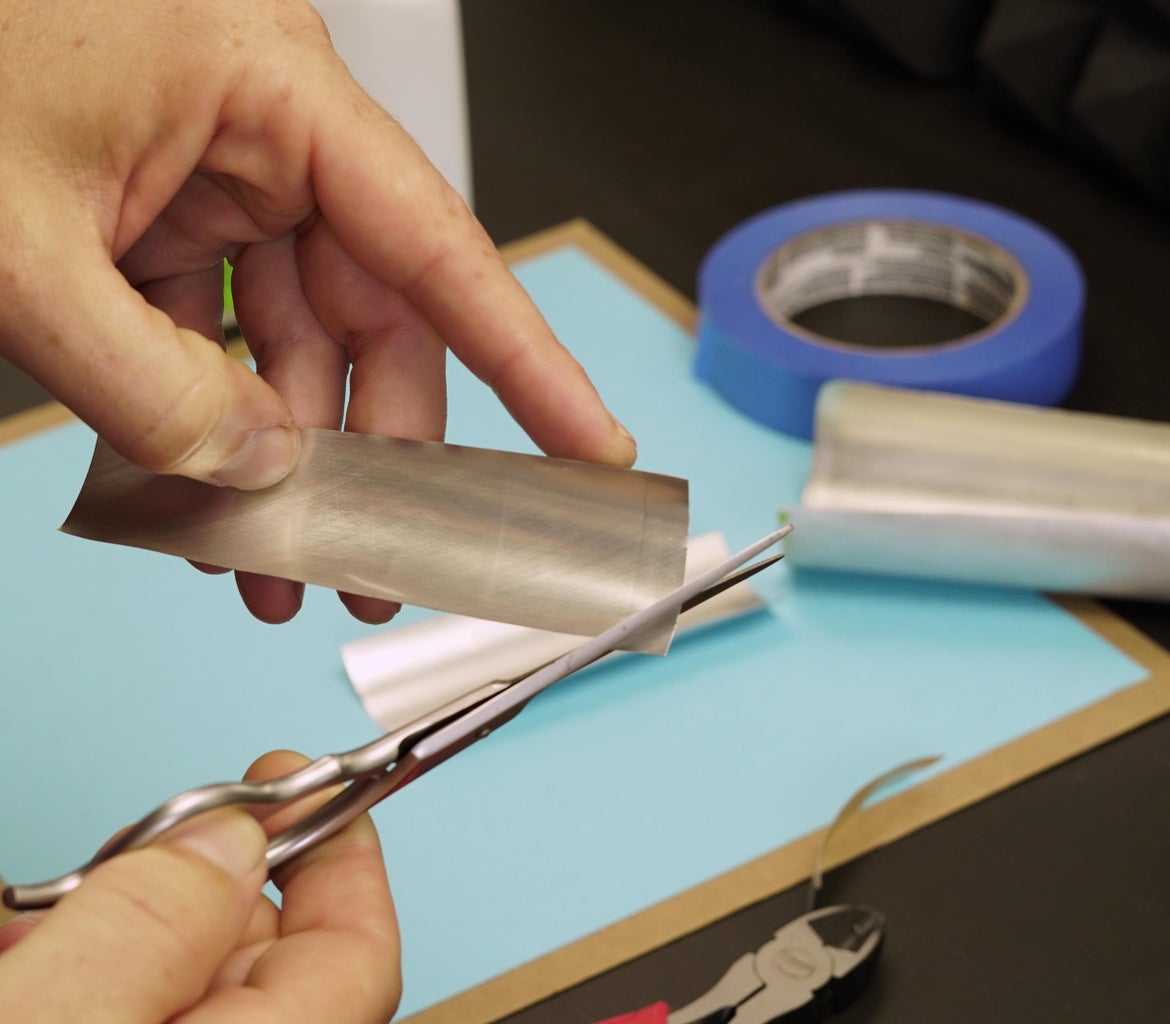
To make a sheet of aluminum, get your hobby knife and scissors. With the knife, make an incision close to the bottom rim of the can, then cut all the way around and remove the bottom. With scissors, cut from the bottom to the top, but turn the cut quickly to the left or right before getting to the rim. Cut around and remove the top. Get rid of ragged edges with new, clean cuts.
Unroll the can on a flat surface. Run a chopstick or pen across it to remove some of the curl.
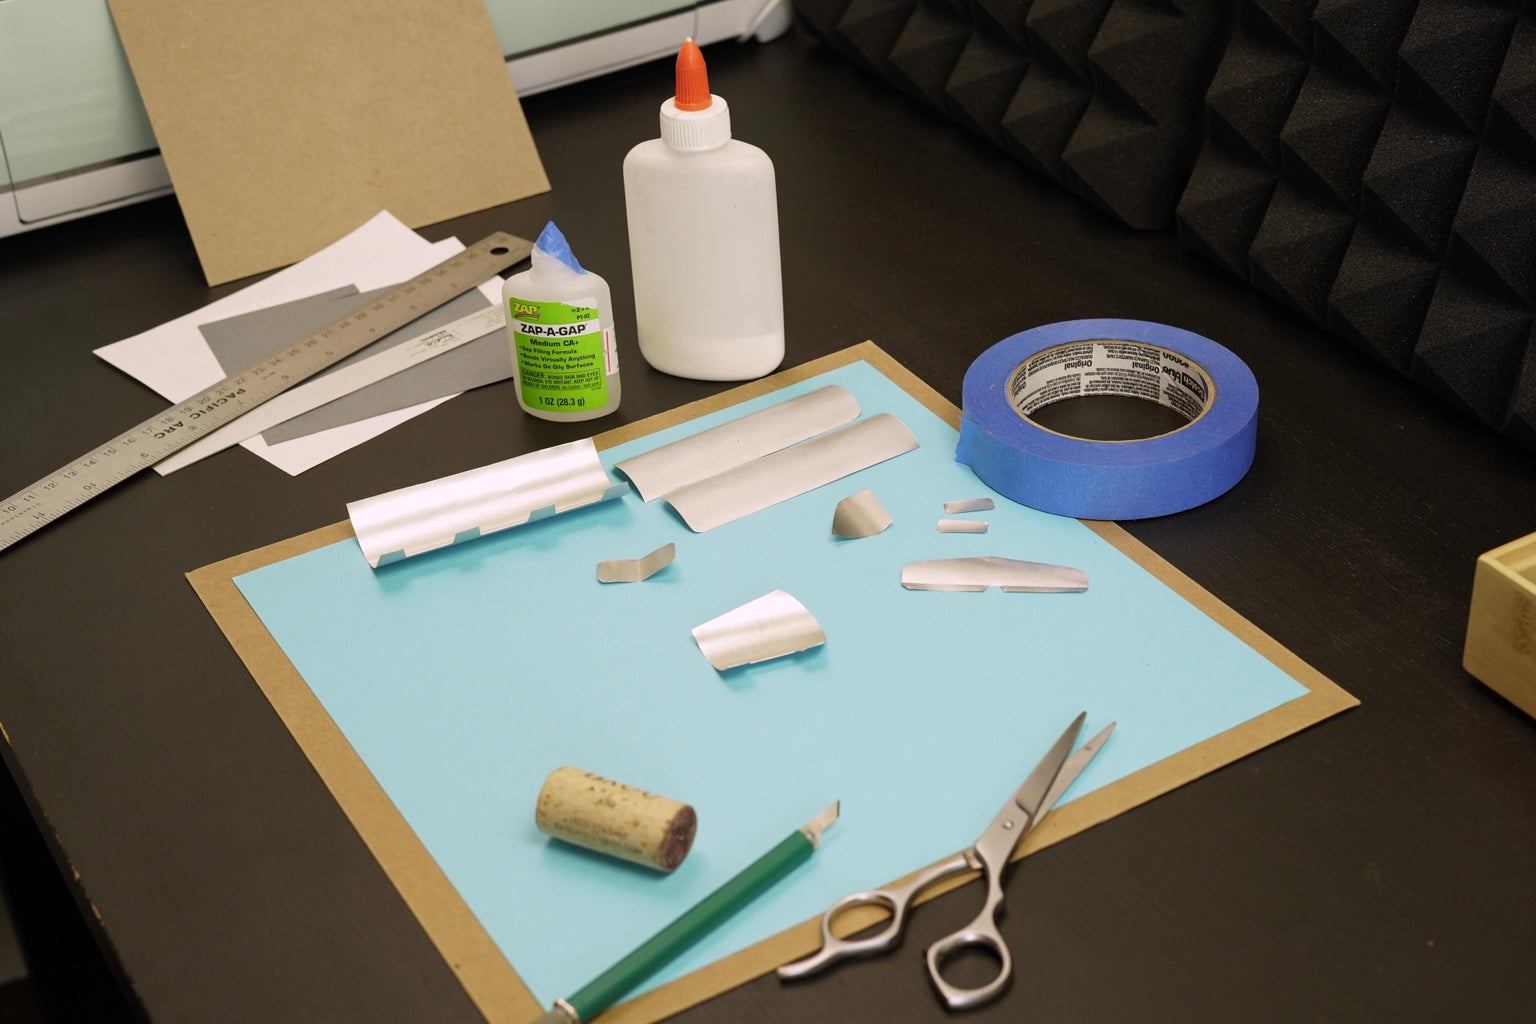
Step 2: Cut Out the Pieces
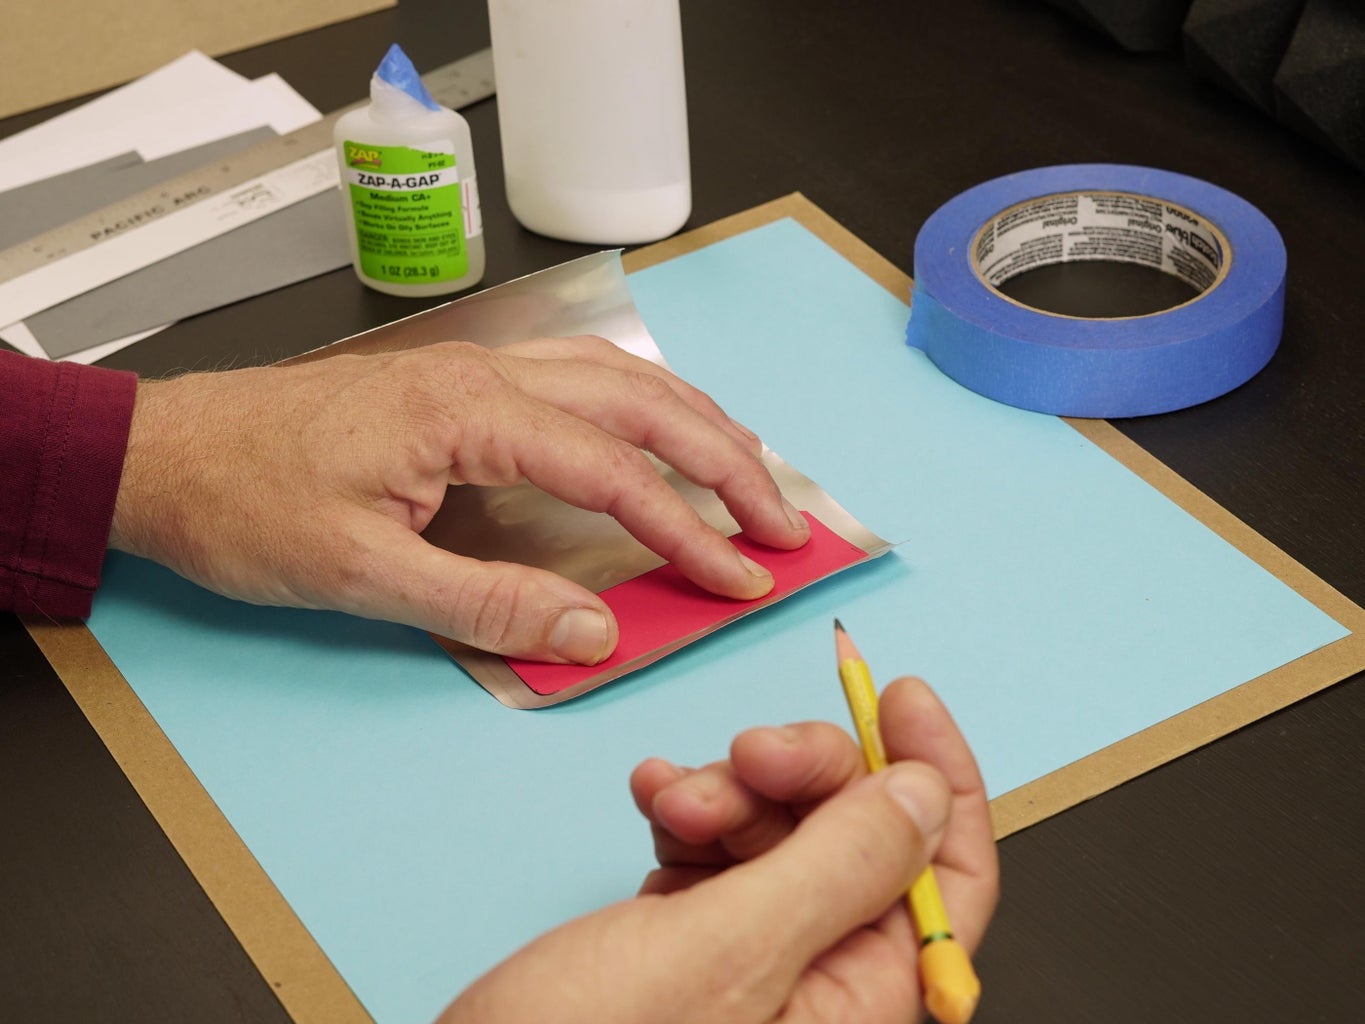
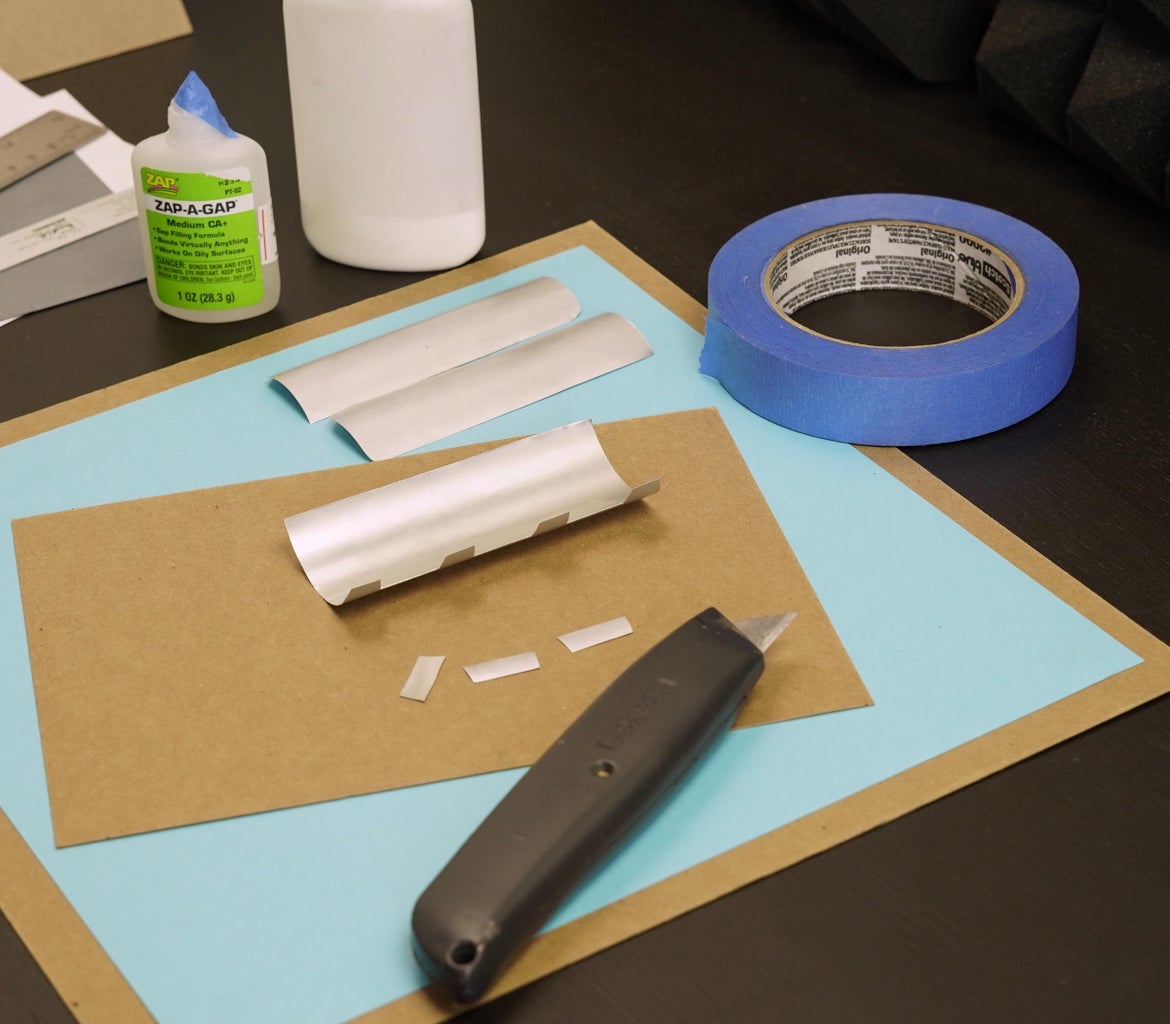
Measurements will be provided in later steps. I did not make printable plans for this design, as I usually do.
**Basic plans are now available in the PDF below.**
Draw your pieces on scrap paper or card stock, then use a pencil to trace these onto the aluminum. If preferred, you can temporarily attach them with some PVA glue. The wings and fuselage need to be curved in a certain orientation, so use the shape of the soda can to your advantage! Cut out the pieces.
Attachments

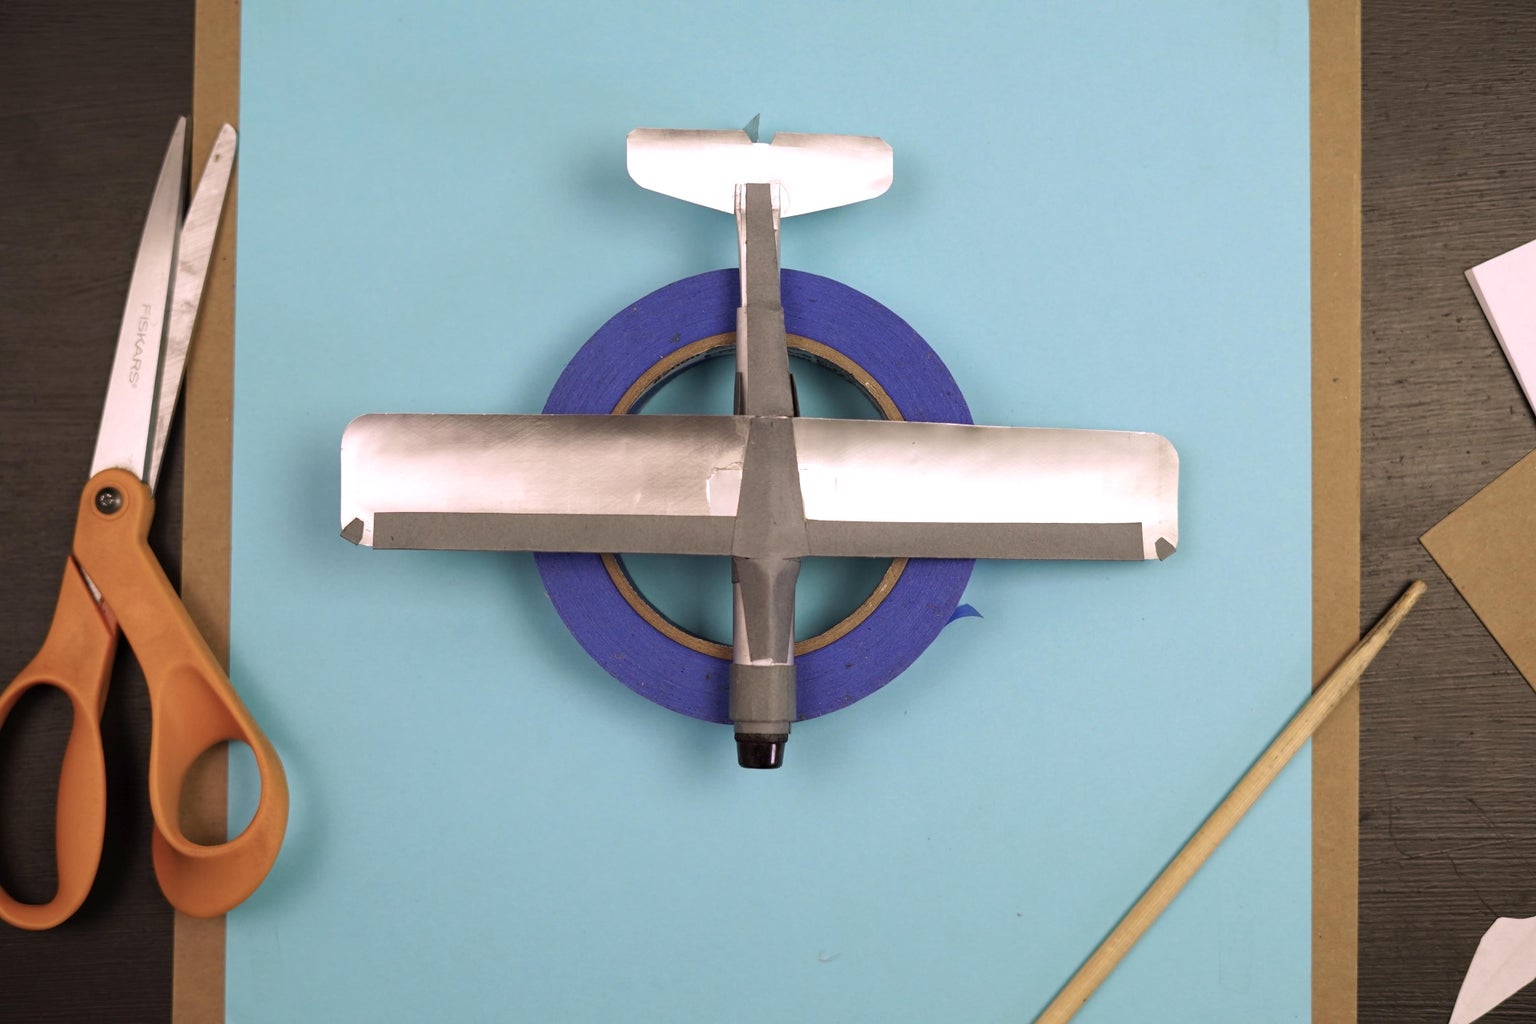
Step 3: Main Fuselage Section and Wings
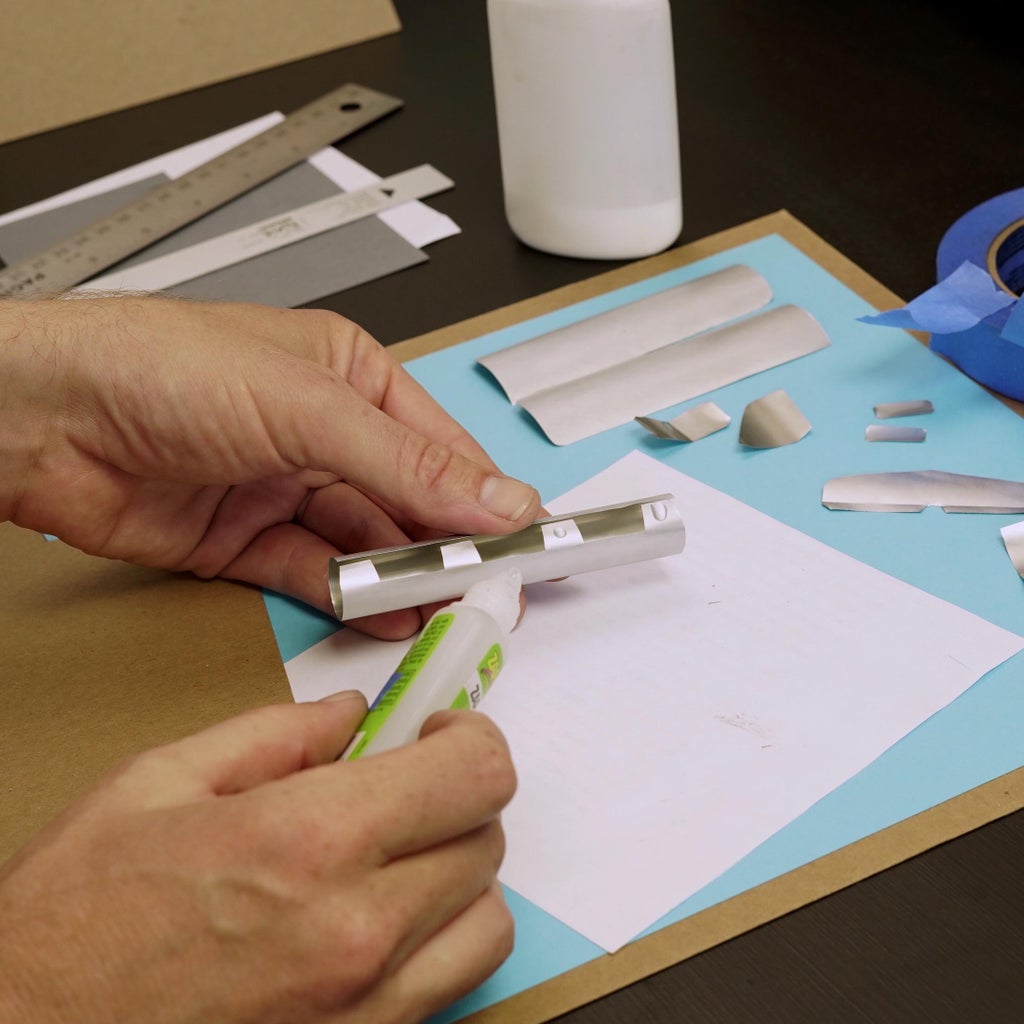

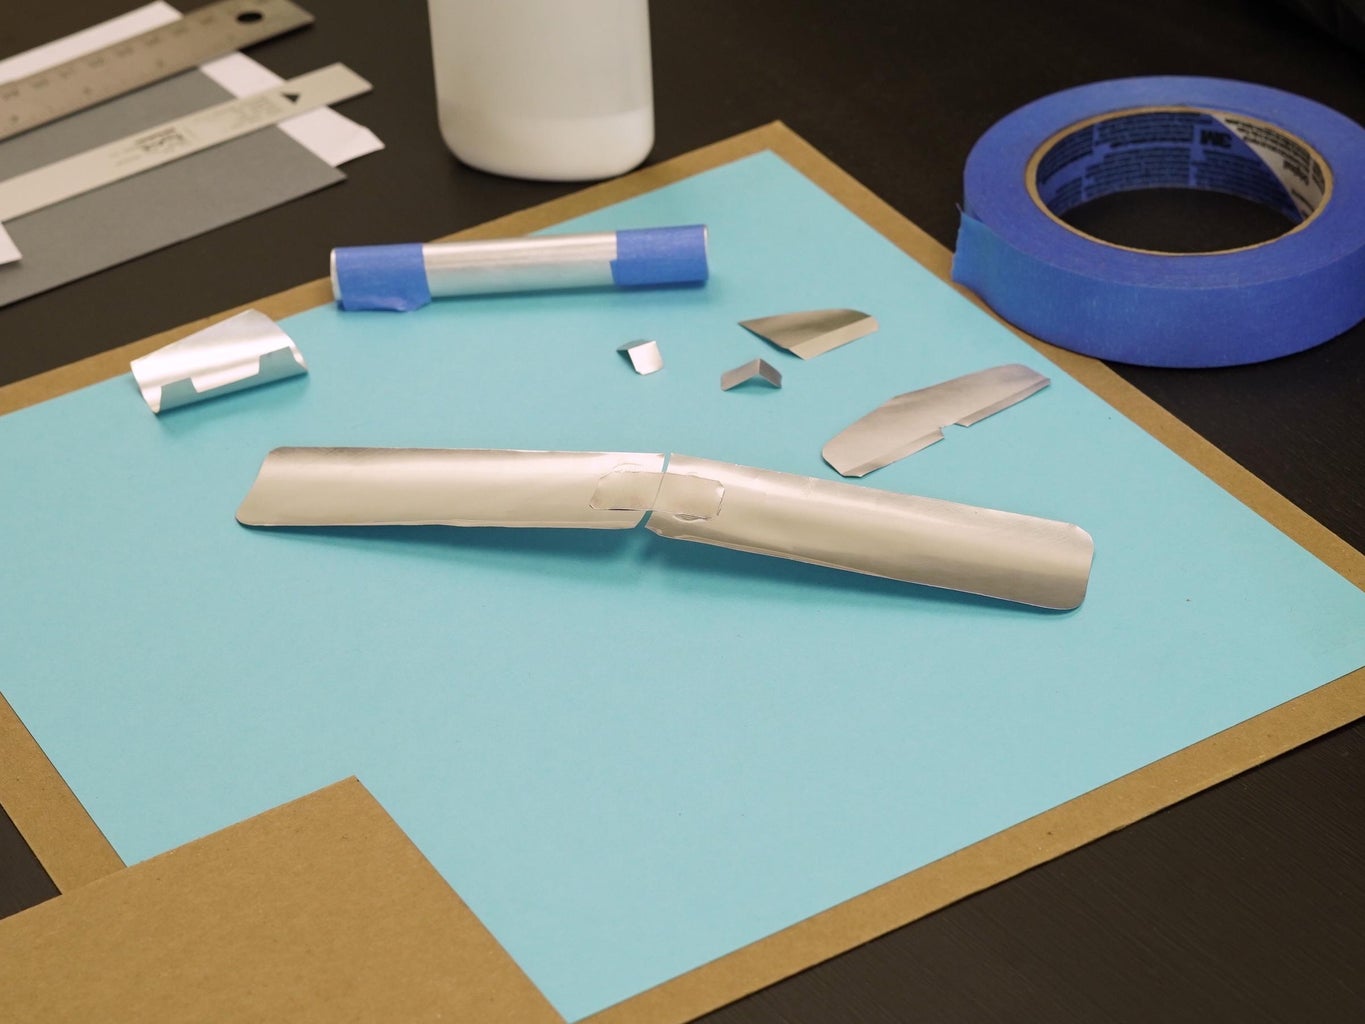
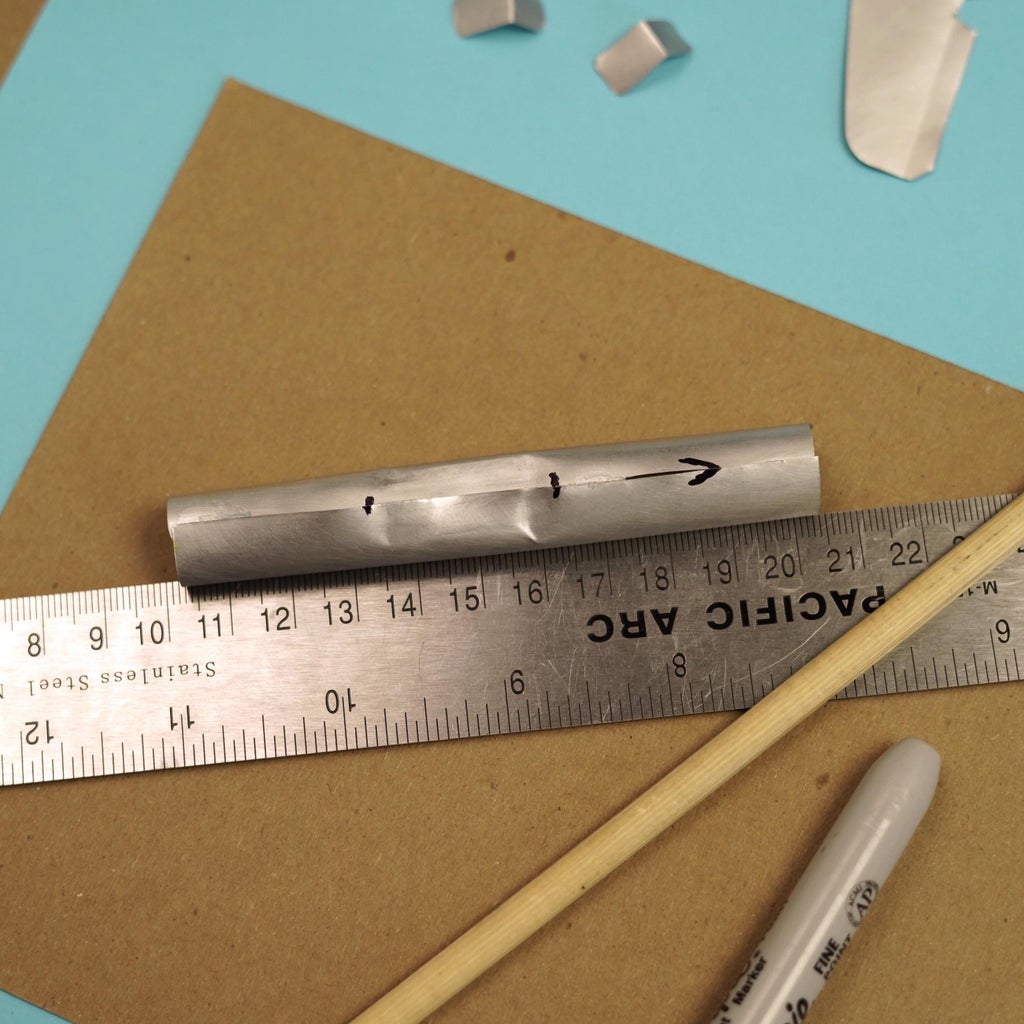
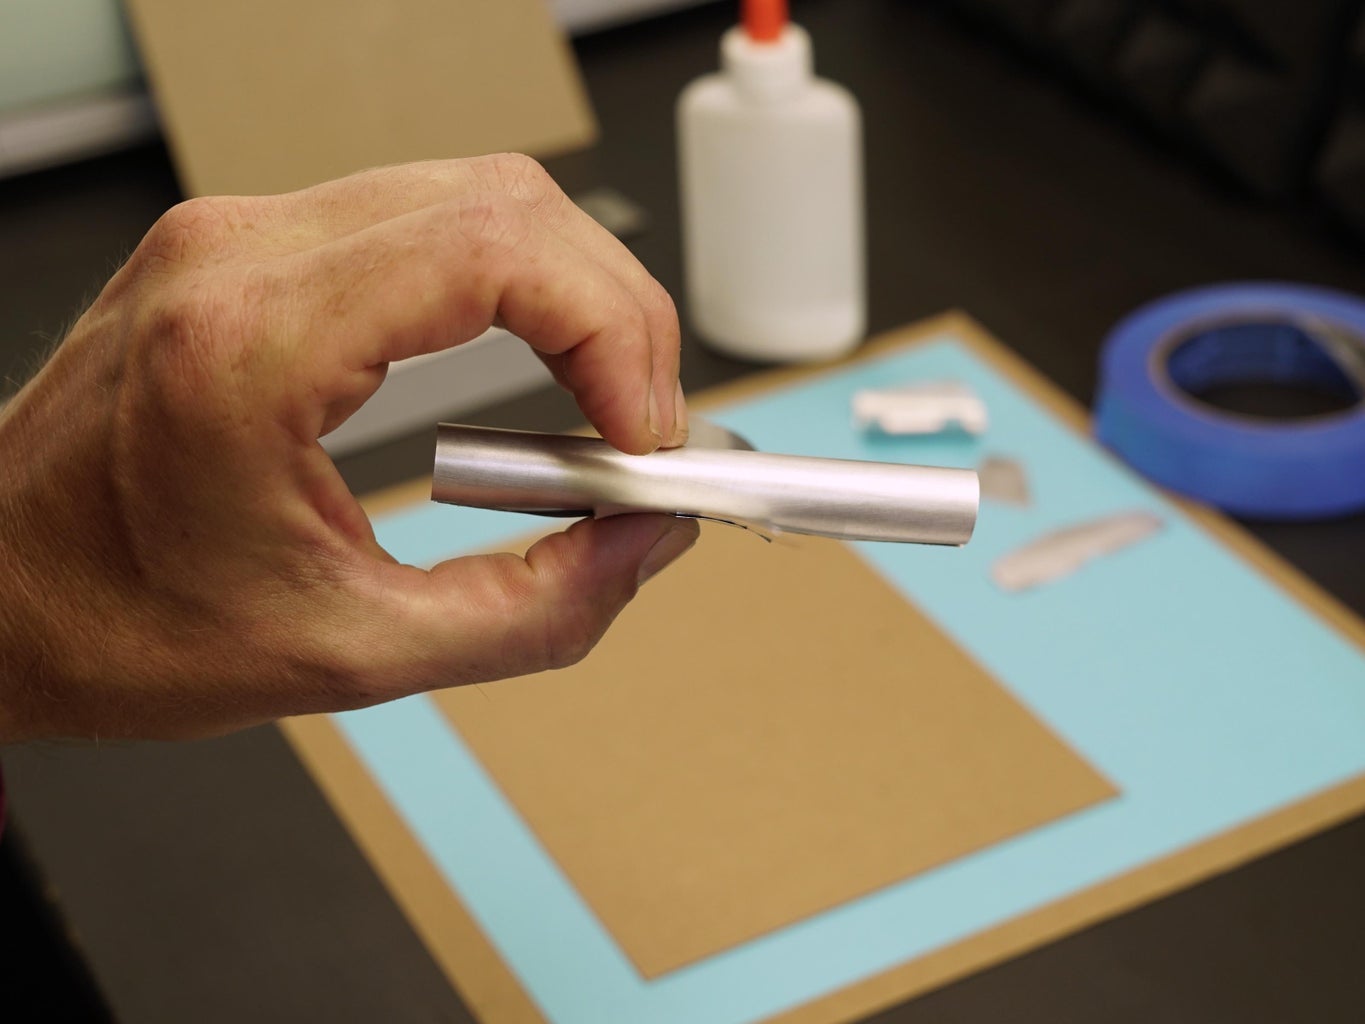
The main section of the fuselage starts as a straight cylinder, 10 cm long and 4.6 cm wide, with four tabs on one side. To shape the aluminum without accidentally creasing it, repeatedly slide it over the edge of a table or desk to increase the curl. Next, wrap it around a cylindrical object, such as a Crayola marker. Use CA glue on the tabs.
The left and right wings each have a span of 10.5 cm each. The chords are 3.3 cm at the center line. Manipulate the contour of each wing to make it a better airfoil. When viewed from the side, the highest point of the wing should be nearer to the leading edge than the trailing edge.
Cut out a small rectangle and use a ruler to make an angle at its center. Use this tab to connect the left and right halves of the wing.
Step 4: Attaching the Wing
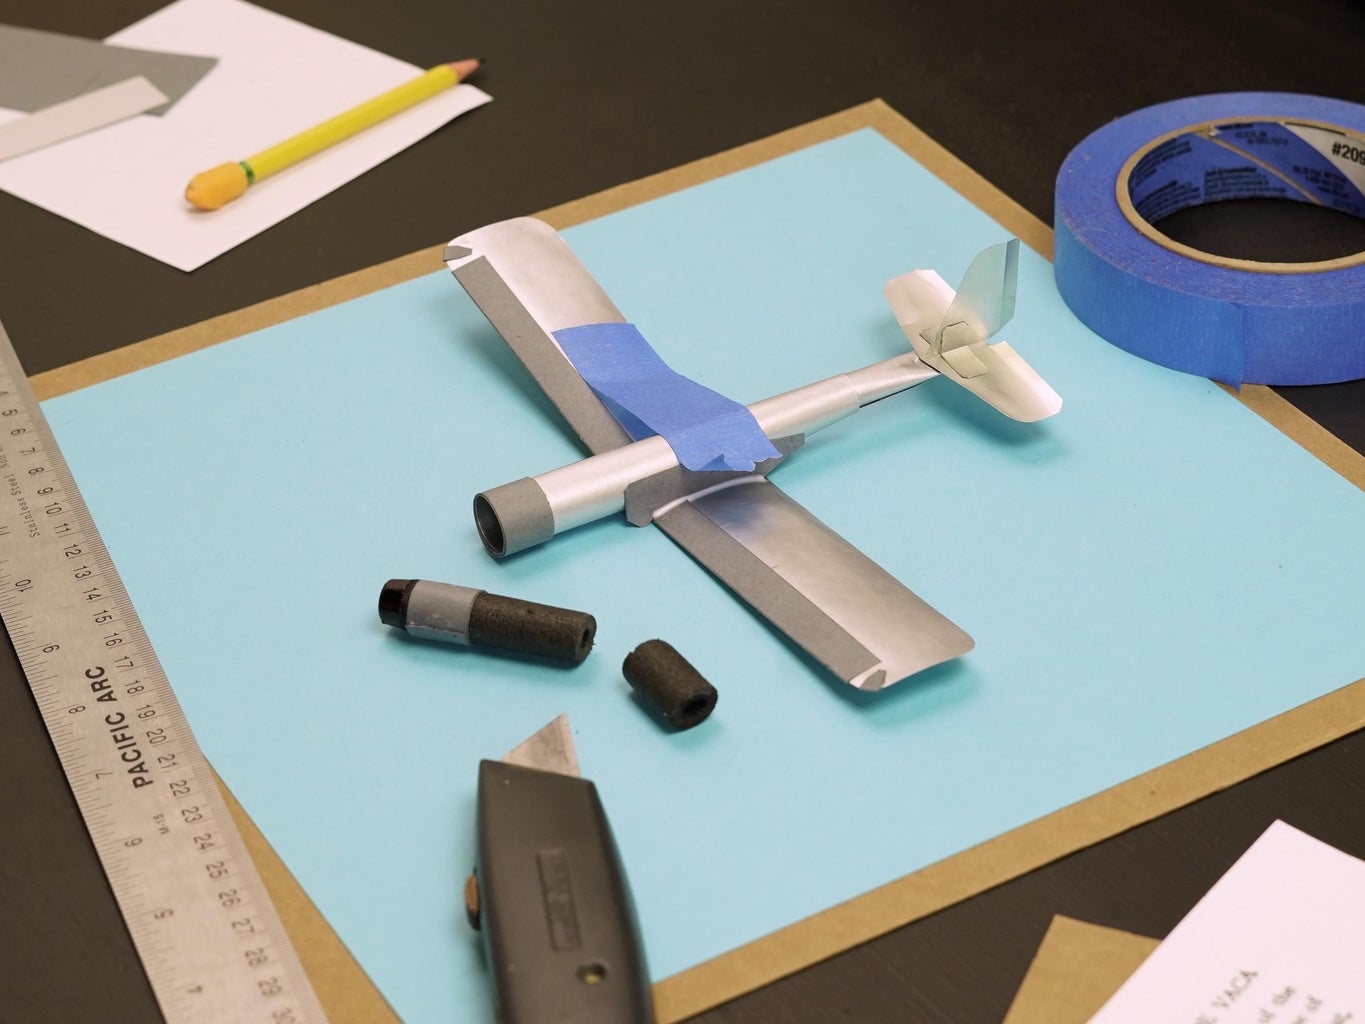
The wing needs a seat. Use a chopstick or pen to make an indentation on the bottom of the fuselage, starting 3 cm from the aft end of the cylinder. Check repeatedly to see how well the wing fits. Use CA to attach the wing.
Step 5: Tail Boom
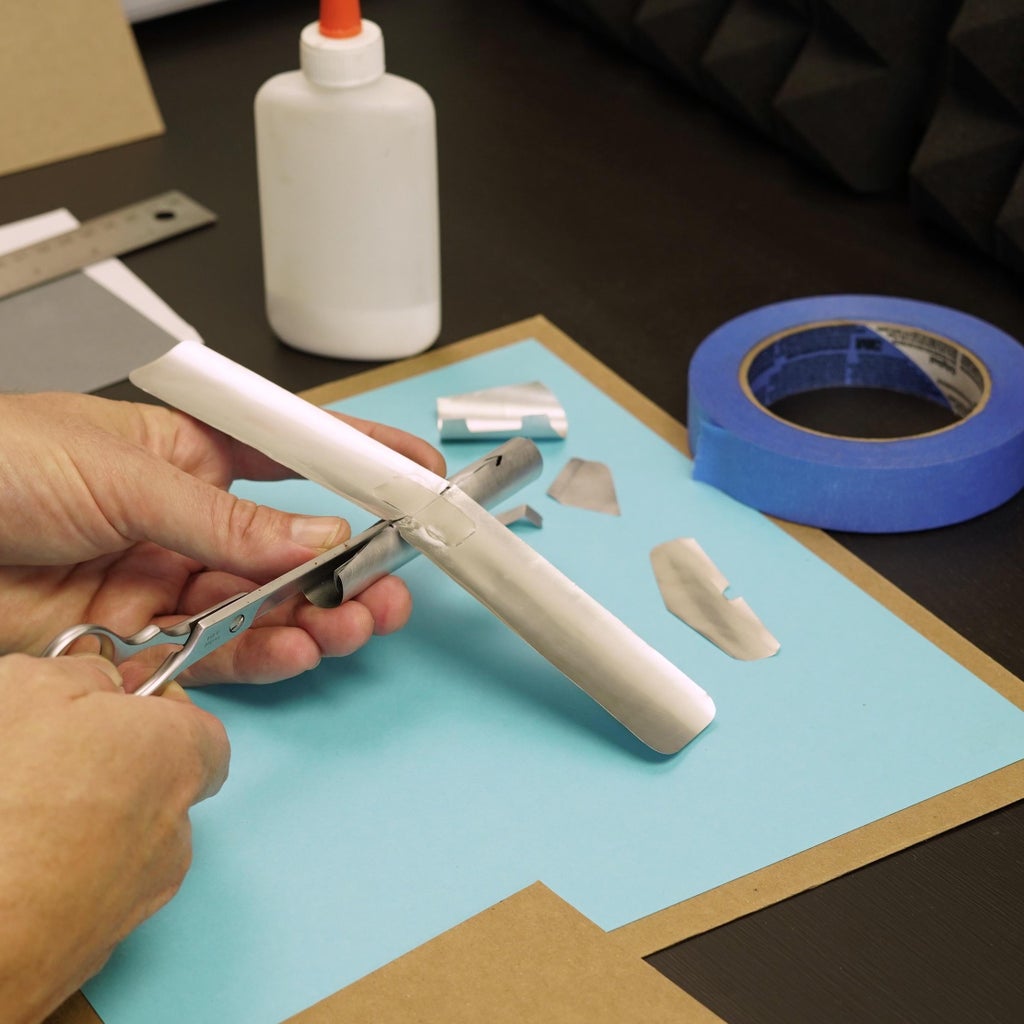
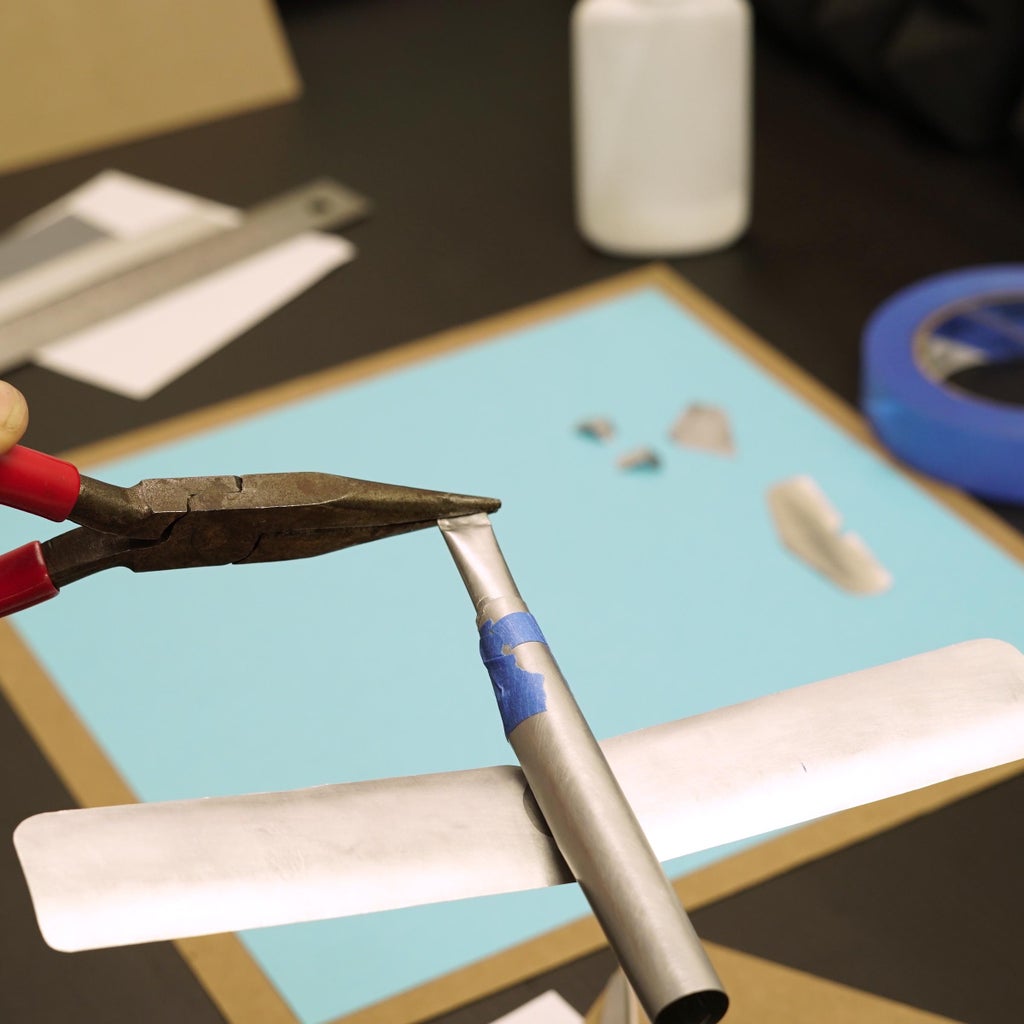
The fuselage should taper. Cut a narrow triangle out of the aft end, at the bottom. Overlap the ends to close it back up. Use masking tape to hold it in place until the glue cures.
To finish the fuselage, make a slightly conical cylinder as a tail boom. Mine was 4.5 cm long, 2.7 cm wide at the bottom, 3.7 cm wide at the top, and had two tabs (see last picture in step two).
To create an attachment point for the horizontal stabilizer, use pliers to flatten the last centimeter of the tail.
Step 6: Stabilizers
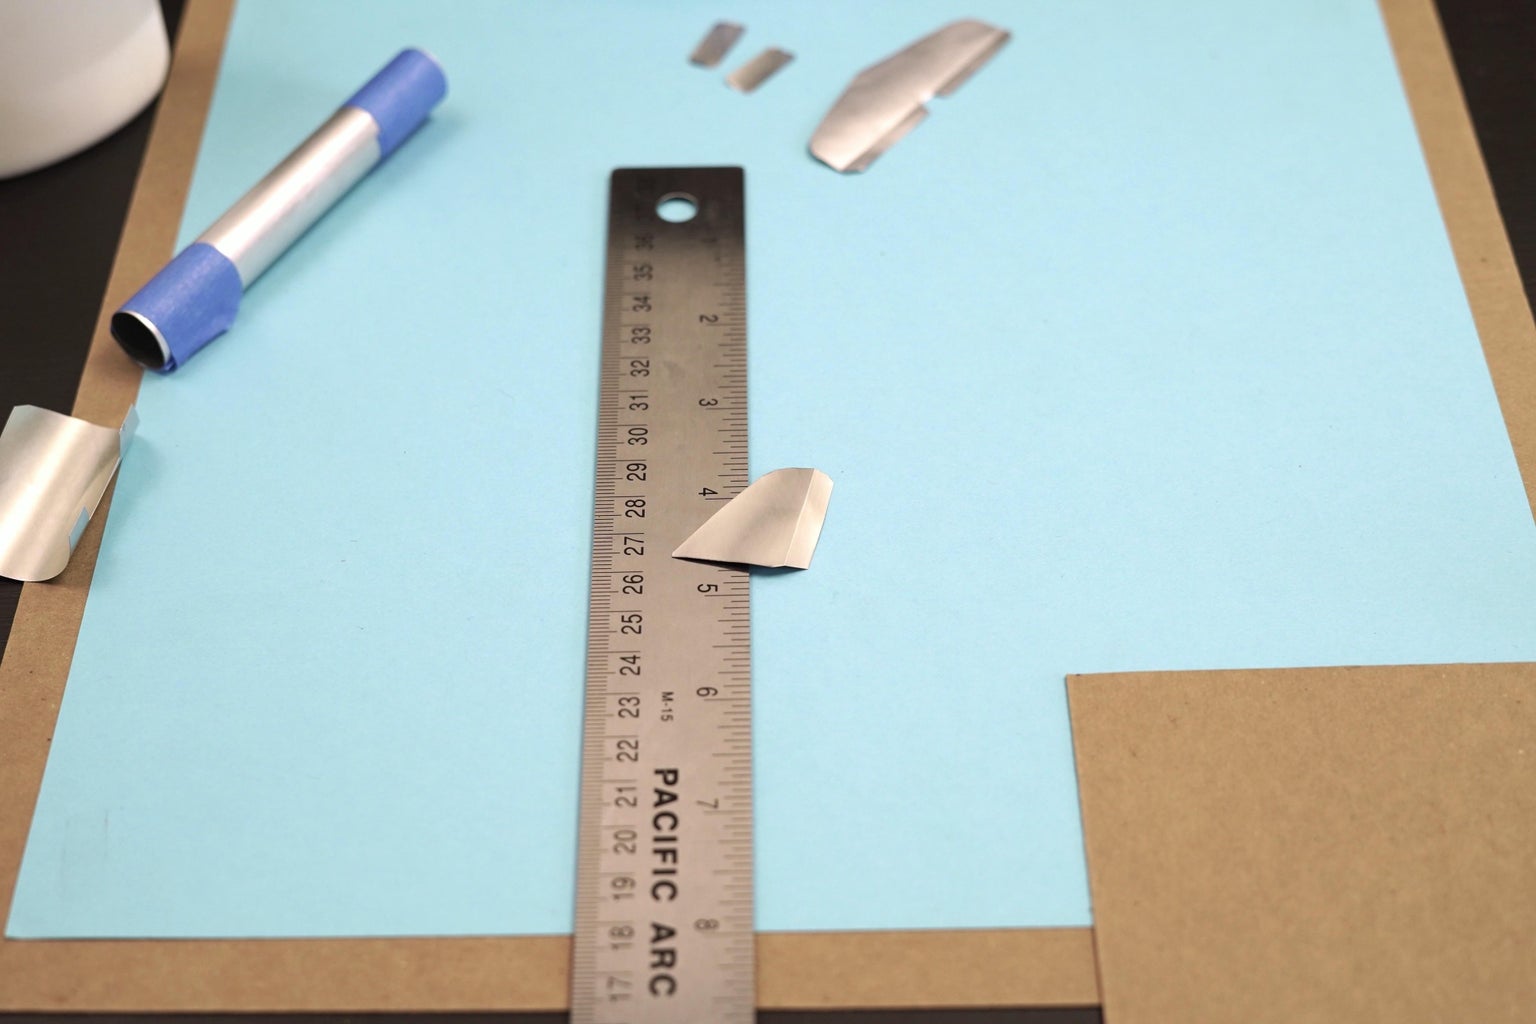
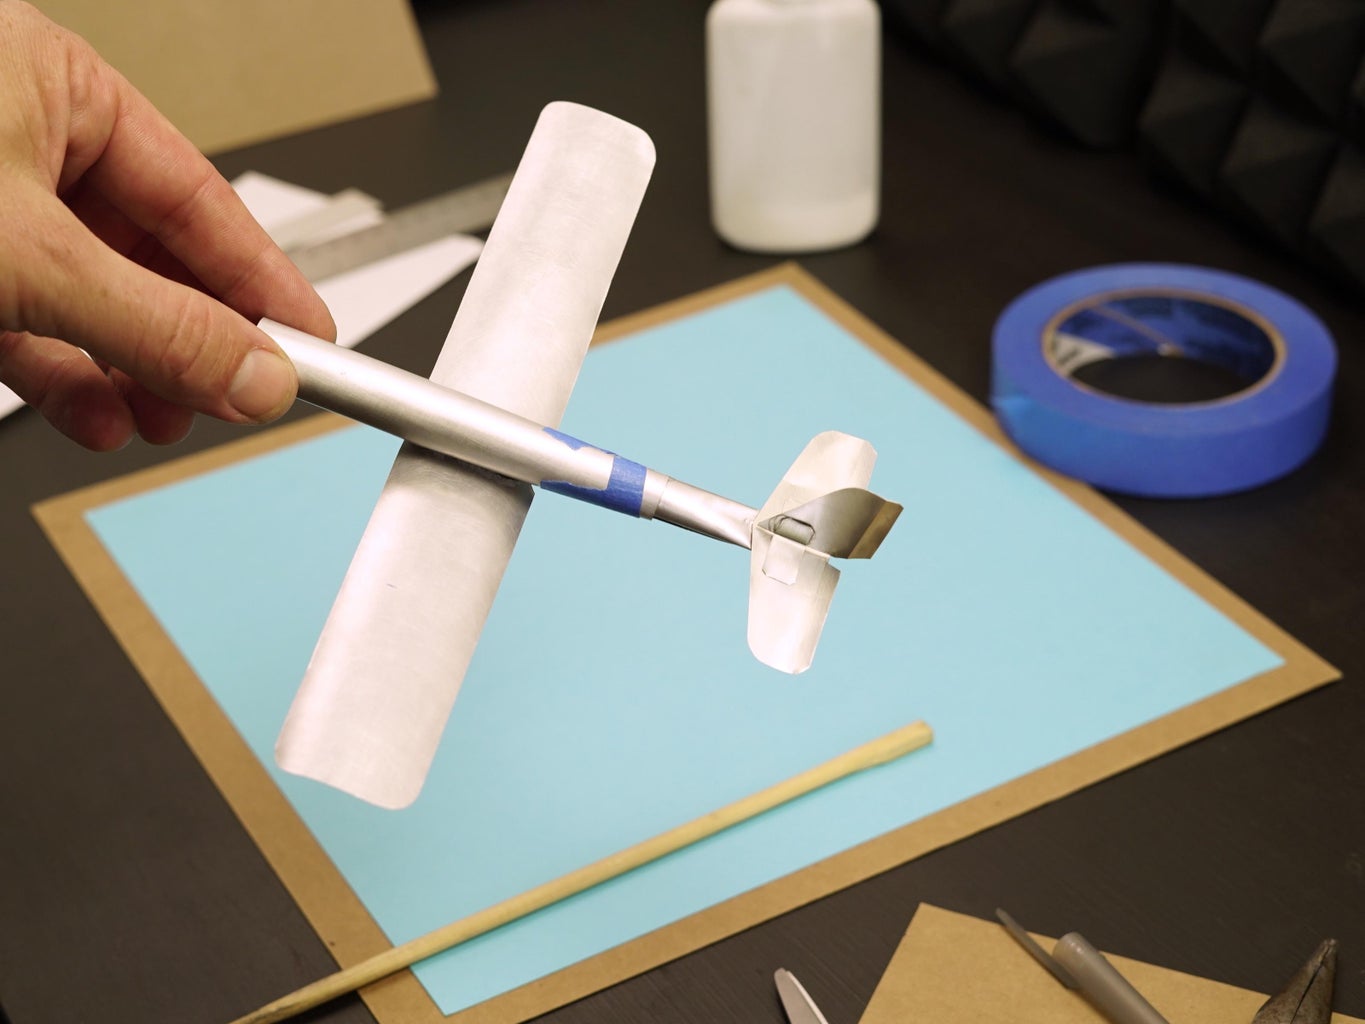
The vertical stabilizer is 2.7 cm tall and 2.7 cm long at its base. The horizontal stabilizers are a single piece, 6.7 cm wide and 2.3 cm long at the center.
Step 7: Card Stock Pieces
To protect the leading edges of the wings, cut strips of card stock and fold them over the leading edges. You can use PVA glue to attach these. Draw and cut out two covers for the wing roots. Lastly, you need to add strength and weight to the nose. Cut a strip of 1 cm x 15 cm and wrap it around the nose. Again, you can use PVA glue for this step.
I also cut some custom shapes to cover the seams on the bottom of the glider, and some little pieces to look like wing tip lights.
Step 8: Nose Insert
Nerf darts are a common form of litter, and I've collected several over the last year, thinking I would find a use for them. The dart absorbs the shock of impacts, which is great. Pebbles or beebees can be stuffed into the dart to increase nose ballast, if needed. The center of gravity of this glider should be about 1 cm back from the leading edge of the wing. If you don't have a Nerf dart, a good substitute would be a piece of kneaded eraser or modeling clay, rolled into a ball or egg shape.
I trimmed the dart by 2 cm and blackened the tip with a marker. I then wrapped and glued (with PVA) a card stock collar around it to make a friction fit with the fuselage.
(Note: the tape in the above picture was used to raise the right wing tip a bit; the CA hadn't cured, so I was able to make that adjustment.)
Step 9: Finishing Touches
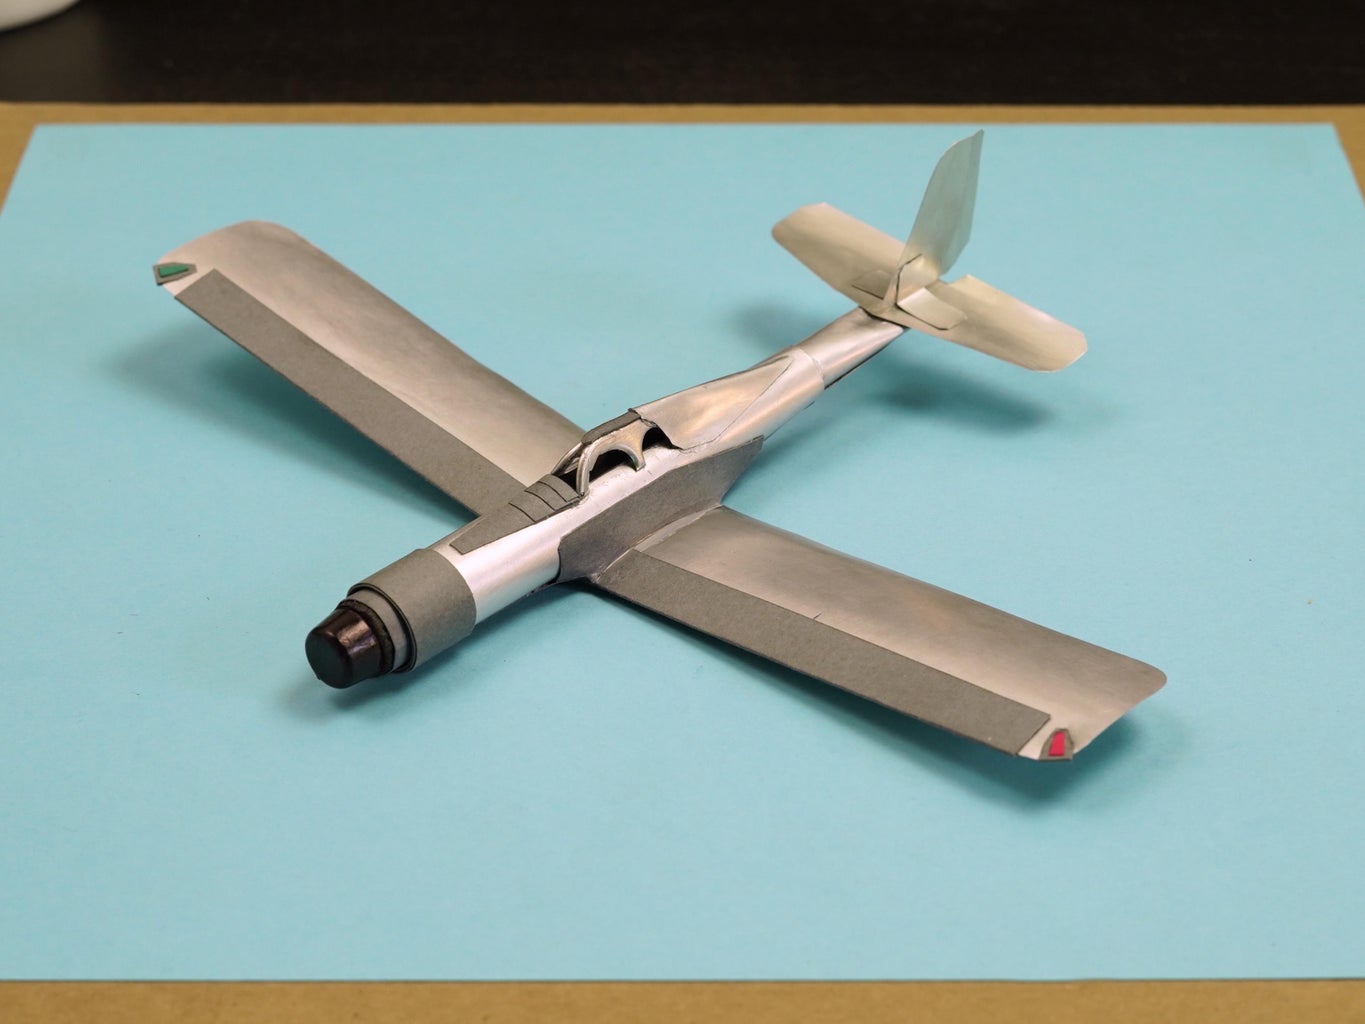
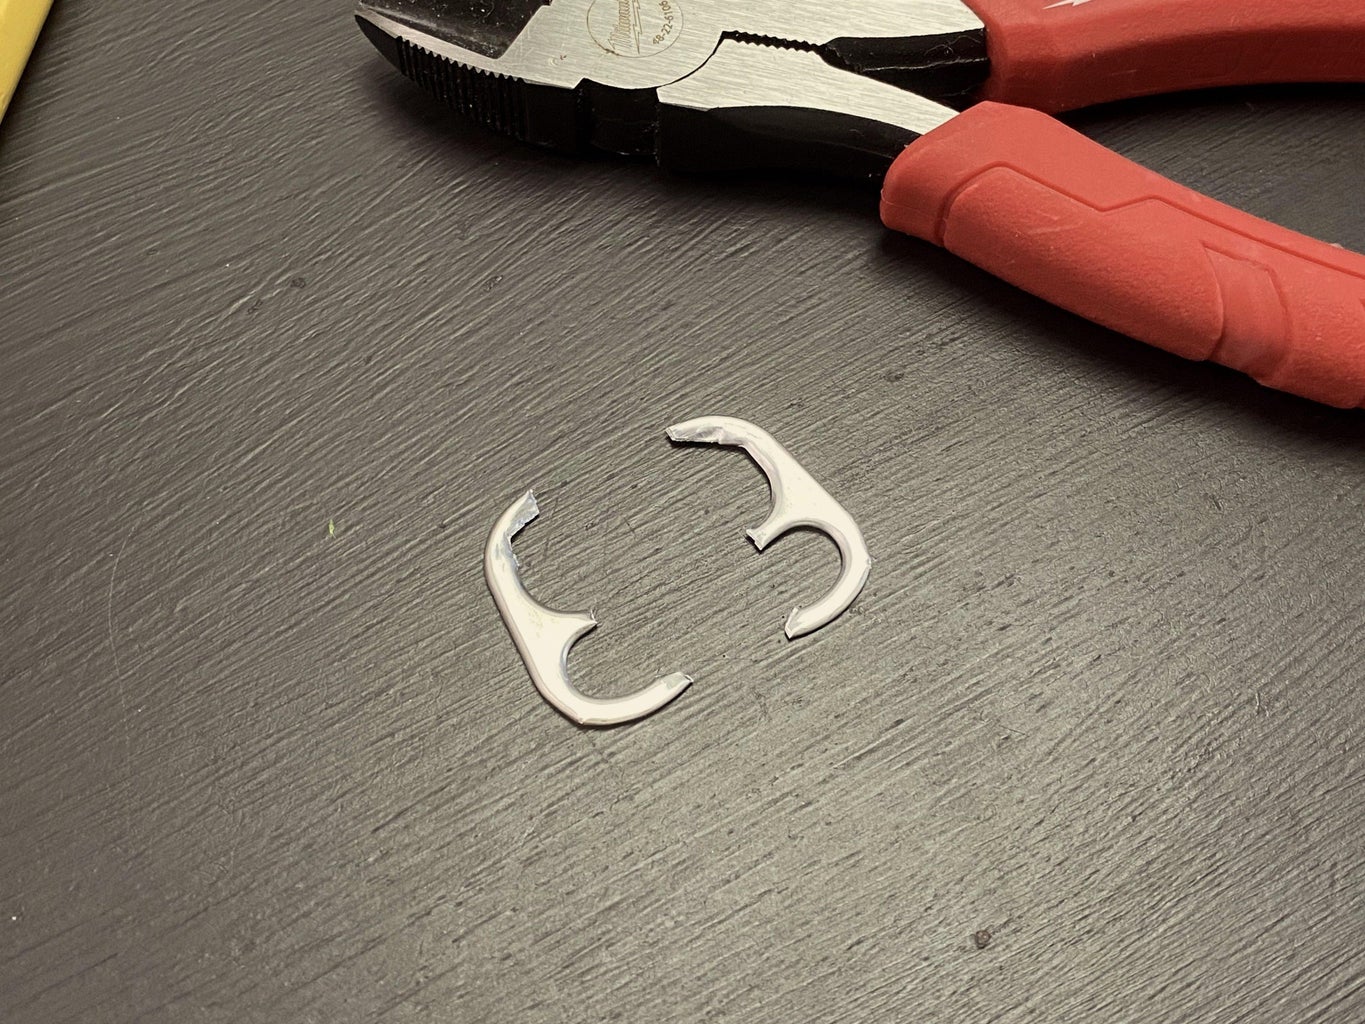
The canopy is made with two tabs from cans. I cut them such that the back ends were a bit longer than the others, making a kind of hook, and I poked two holes in the fuselage for these. CA glue at the joints with hold them in place. A strip of black card stock between the tabs will help create the illusion of a cockpit. The back of the canopy is covered with an aluminum piece that is roughly triangular in shape.
Step 10: Reflection
Is aluminum a good material for model airplanes?
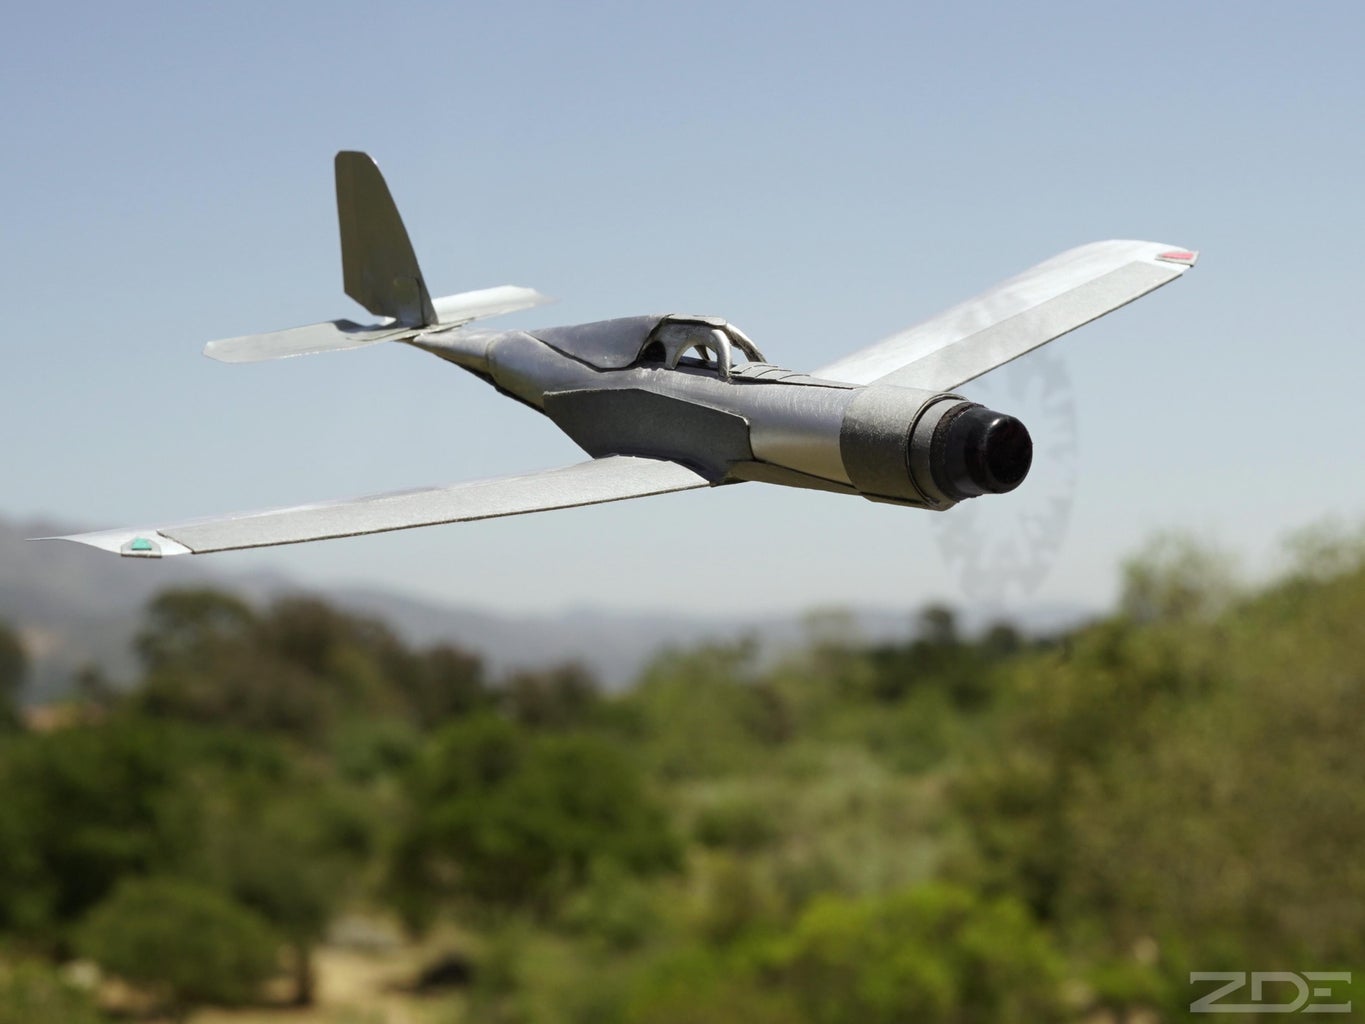
There are many amazing examples of static models made out of cans, as in this AOPA article about a maker in Montana. But as far as functional gliders are concerned, it isn't great. Maybe I would have a different opinion if I continued to work with it. Aluminum is definitely prone to creases and crinkles, which are difficult or impossible to iron out. Achieving good flights was difficult because the glider was somewhat heavy, and adjusting things like the wing contours and elevators was a challenging process.
Thanks for reading!
Here is the video for this glider.

This is an entry in the
Metal Contest


38 Comments
Question 21 hours ago
while working with aluminium I'm getting lots of dents and creases that I can't fold out
how did you make yours smooth?
Answer 9 hours ago
Thanks for the question! It can take some time and practice. ... For the fuselage, you could use cylinders of different sizes (broomstick, large marker, etc.) as jigs to gradually shape the aluminum.
9 days ago
I would add some control surfaces to allow you to get it to fly in a circle...or other directions ... I would not think it too hard a task... might have to try it myself. !!
Reply 8 days ago
slight rudder adjusment will make it fly left or right
12 days ago
did u use anything other than glue to stick the pieces?
I'm planning to use solder , would that work?
Answer 12 days ago
That's a great idea, but "normal" solder won't stick to aluminum. Plus, the added weight would make an already heavy glider even heavier. A careful application (and probably a lot of delicate, custom cutting) of double-sided tape (automotive type, likely) would probably work.
Reply 8 days ago
you're right
normal solder isn't working, is there a special type of solder to use? i don't see anything on the web
Best Answer 8 days ago
If you got solder to bond, it contains lead or silver, which would add considerable weight. TIG weld would be an option, provided this is not the only project you have for TIG welding. (expensive setup.) Probably best to stick with CA.
Answer 11 days ago
Keep in mind that soda's can interiors have a cover of poly film.
Answer 12 days ago
aluminum is challenging to solder. practice on scrap before attempting to solder functional pieces.
Answer 12 days ago
You could though it may increase the weight. It would probably be stronger though. You might also have some tricky time getting enough heat into the joints to solder
Answer 12 days ago
I used CA (cyanoacrylite, or Super Glue). Someone suggested solder in the video comments, but it might add a lot of weight. ... The glue bonds would be stronger if I roughed the surfaces with course sandpaper. On the other hand, having predictable failure points can also be a good thing.
9 days ago
It looks so amazing!!
11 days ago
Excellent response to my comment made yesterday. The " aluminum can glider plans ZDE pdf " file is exactly what I was referring to. This will allow duplication of the lines and profile. Now I can Try and duplicate this build with some sense of accuracy.
Thank you
12 days ago
Excellent Craft. Looks great and I want to make one. Is there any way you could create a pattern sheet for the soda can cut outs? That would definately be useful in order to duplicate the lines on the Aircraft.
Thank You for the Post.
Reply 11 days ago
Thanks. I added plans to Step 2.
12 days ago
Very well put together Instructable. Thank you for the time you spent sharing it with us. Might I suggest for strength and presentation
Reply 11 days ago
Glad you liked it. ... The aluminum roll is a good idea, but I also like reusing waste when possible.
11 days ago
Nice instructible. Hmmm. Maybe you just need to scale it up to keep from getting creases and crinkles. Where did I put that 55 gallon drum?
Reply 11 days ago
Yeah, but I'd have to learn how to weld first. lol