
Introduction: 3D Printed Voronoi Moss Pole


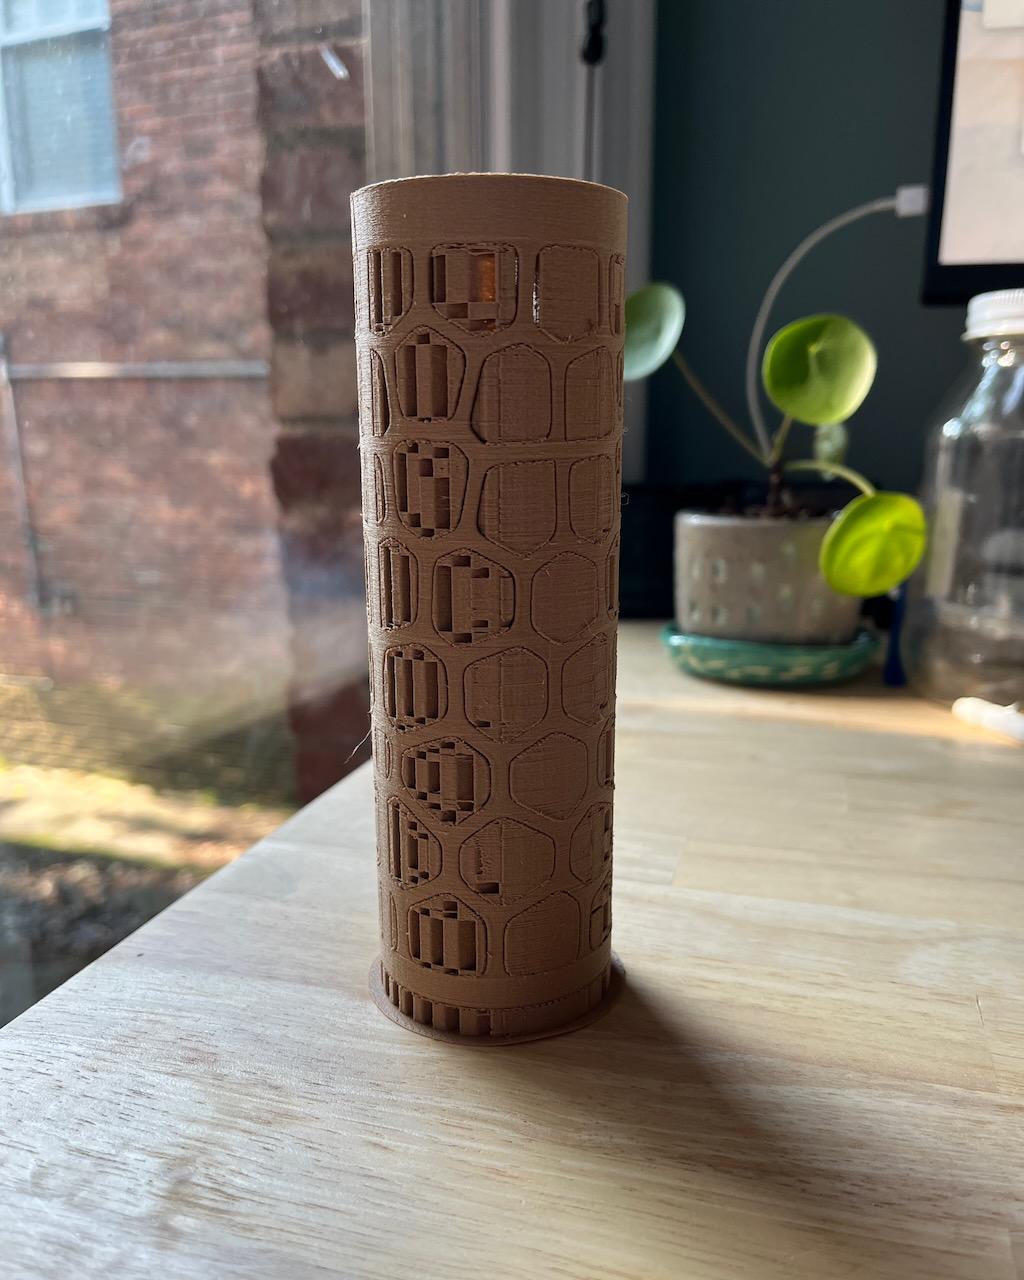
Some plants need a little extra support, and a moss pole can be a great way to provide that. Moss poles can be expensive, but 3D printing and making your own can significantly reduce the cost and allow you to customize it to your decor and your plant's height. This moss pole features a voronoi pattern to make it look more natural and imitate forms found in nature.
Files found in this instructable may be used for personal use and are not to be used commercially. Links to products in this instructable may be affiliate links. Using affiliate links helps to support creating DIY projects like this one.
Supplies
For this project you will need:
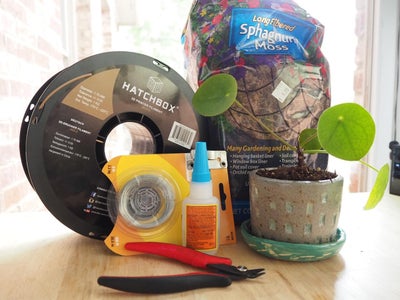
Materials:
Filament- I used Hatchbox wood PLA
Adhesive- I used Gorilla superglue
Spagnum moss, coconut coir, or spanish moss- I used one found at my local Ace hardware but you can find similar items at your local pet store or online
Twine, plant tape, or wire- I used both cotton twine and 20 gauge wire
A plant (the one shown here is purely for illustration, it doesn't need support at the moment)
Sand paper (optional)
Wood Sealer, wax, or conditioner (optional)- I used Howard feed and wax
Tools:
Access to a 3D printer. if you don’t have your own you may be able to find one at your local fablab or makerspace
Computer with slicing software for 3D printing. I am using Prusaslicer.
Pliers or wireclippers, to remove support material from print
Dowel or chopstick, to aide with adding moss
Step 1: Download Files
To get started, download the STL files for this project. They are provided here and can also be found on Printables.


Step 2: 3D Print
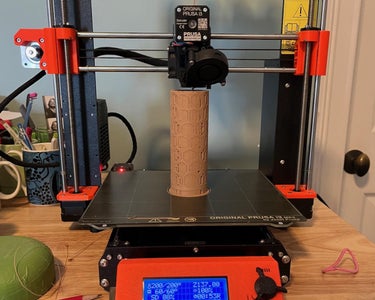
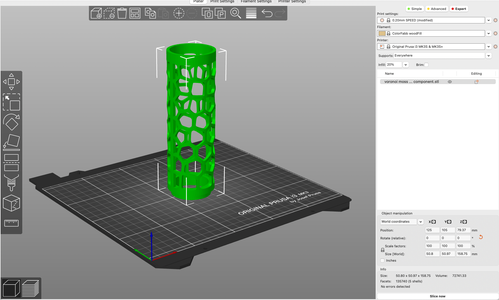
This model is broken into individual components to allow you to customize the height of your moss pole and expand it as needed while fitting within the bed size limitations of most popular printers.
Import the STL files into your slicer. Plate your files and choose your print settings. For this print I chose to print at .2mm layer height on fast settings. Since this model does not contain a lot of fine details, you can print at a higher layer height without sacrificing quality. I chose to print each component separately. Print one base and as many component pole tubes as needed to support your plant.
Depending on your print settings and filament you may need to enable supports. In prusasilcer, I enabled supports “everywhere” with “snug” supports. I chose the default support settings for the filament material profile.
With supports at .2mm layer height, each pole tube took about 8 hours to print, and the stake base took 1 hour and 45 minutes.
Step 3: Surface Finish Your 3D Print
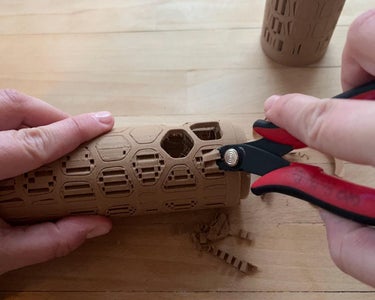
Remove any support material with your pliers or wire clippers.
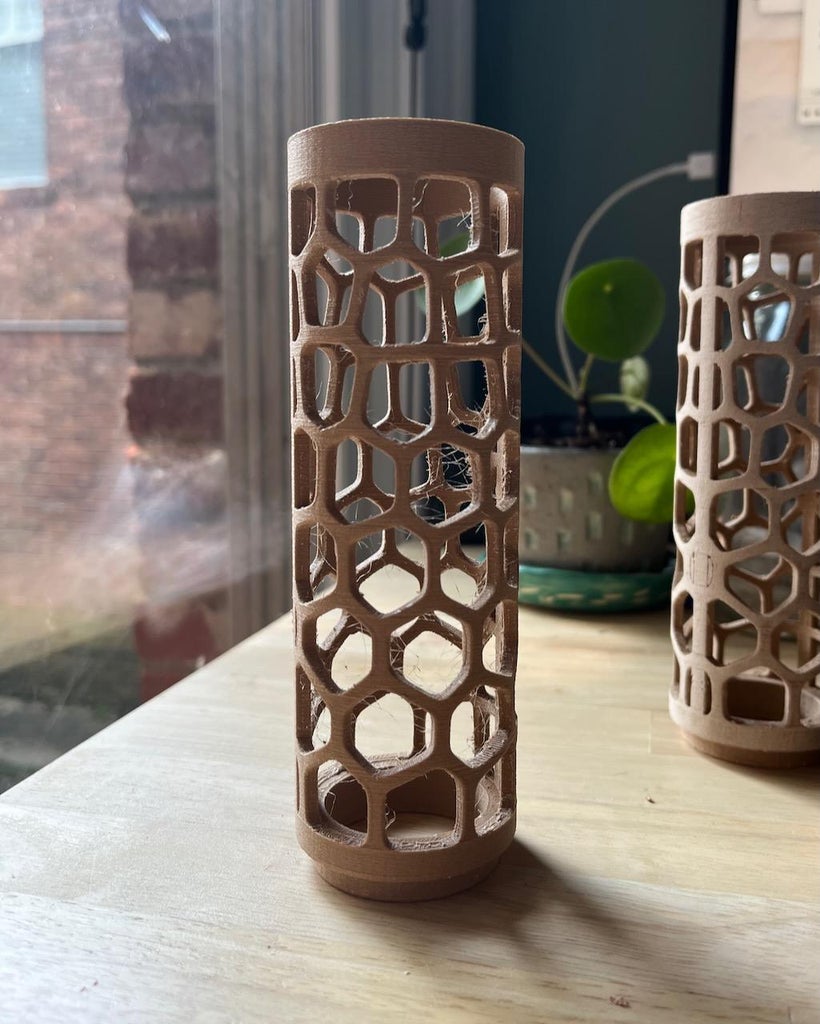
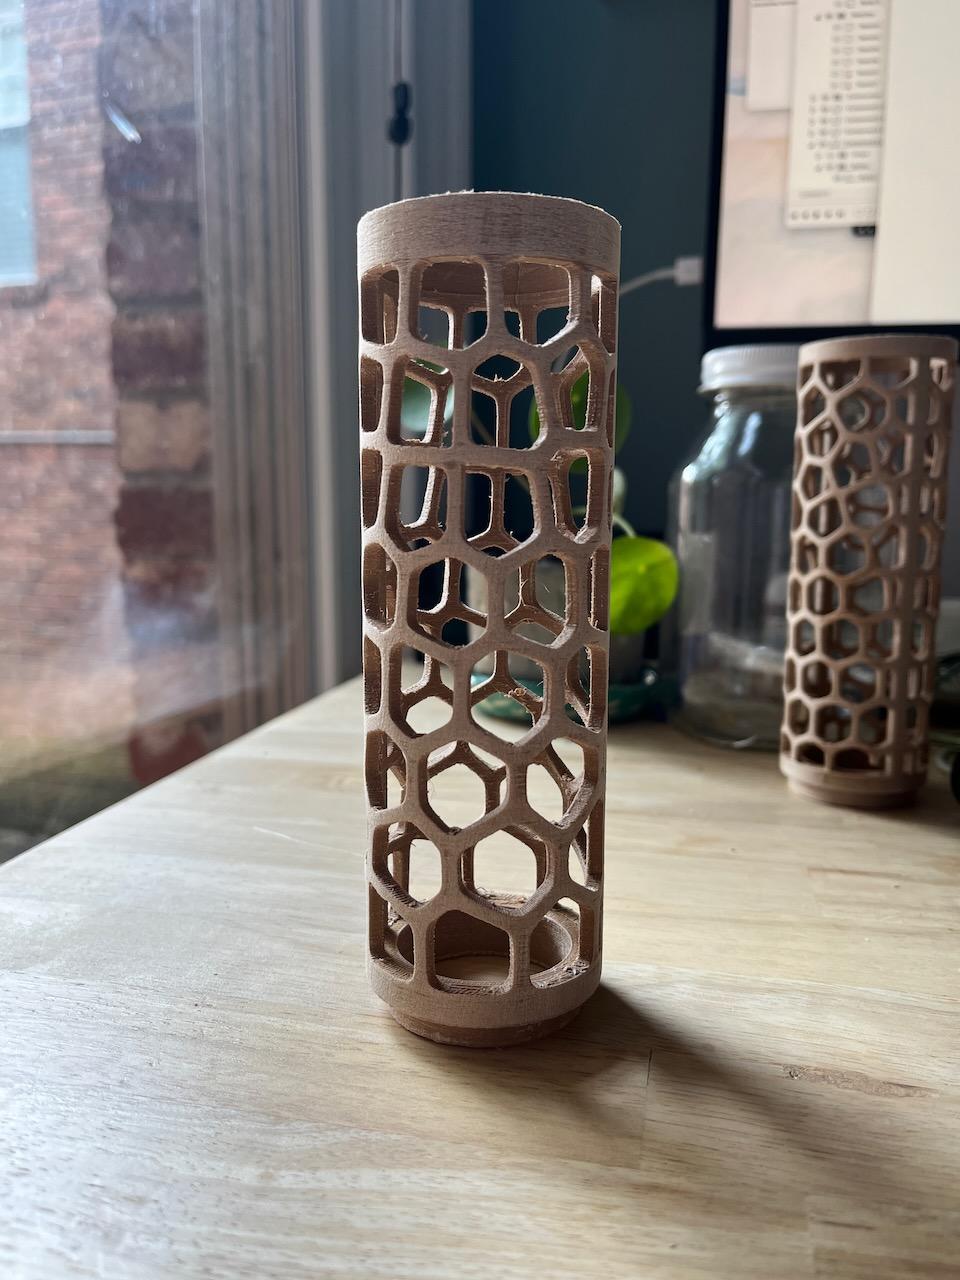
To make the my final product look more polished I chose to sand each of the pole tubes before assembly, moving from 80 grit sandpaper to 220. I then applied wood wax to polish the surface. This step is optional. Use necessary PPE and ventilation when sanding or using wood polishes.
Step 4: Assemble
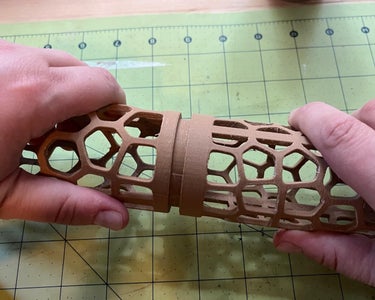
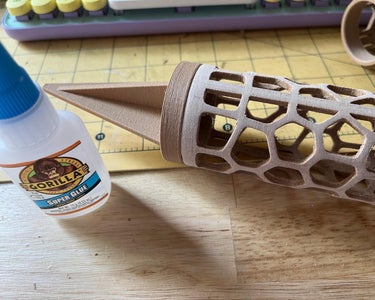
Each component will fit snugly together. To provide the moss pole with more long-term durability, apply glue to each joint. Follow the directions provided with your adhesive. I used Gorilla superglue. After applying the glue to each joint I held them in place for 20 seconds following package directions.
Super glue and epoxy-based glues work well to assemble 3D prints. Use necessary ventilation when using adhesives.
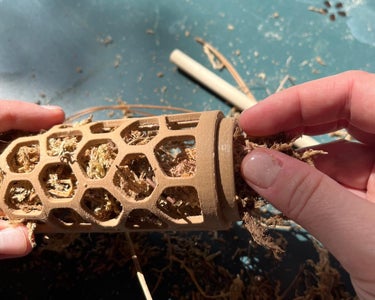
Once all components are glued together insert moss into the interior of the tube. Using a chopstick or a dowel will help you evenly distribute the material.
If assembling more than 2 component poles you may want to switch the order of these steps and insert the moss into the tubes before connecting them together.
Step 5: Attach Plant
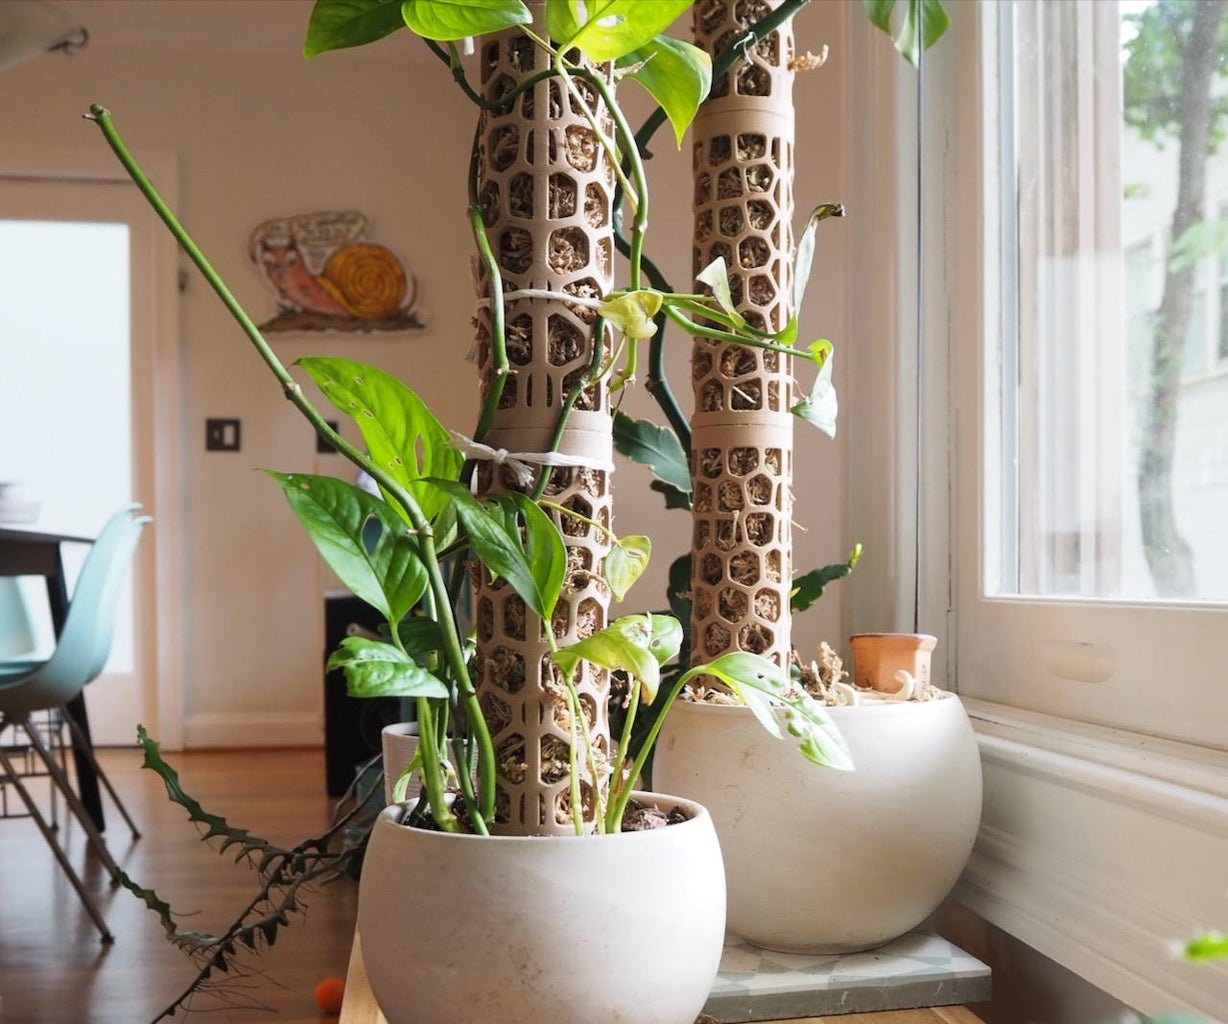
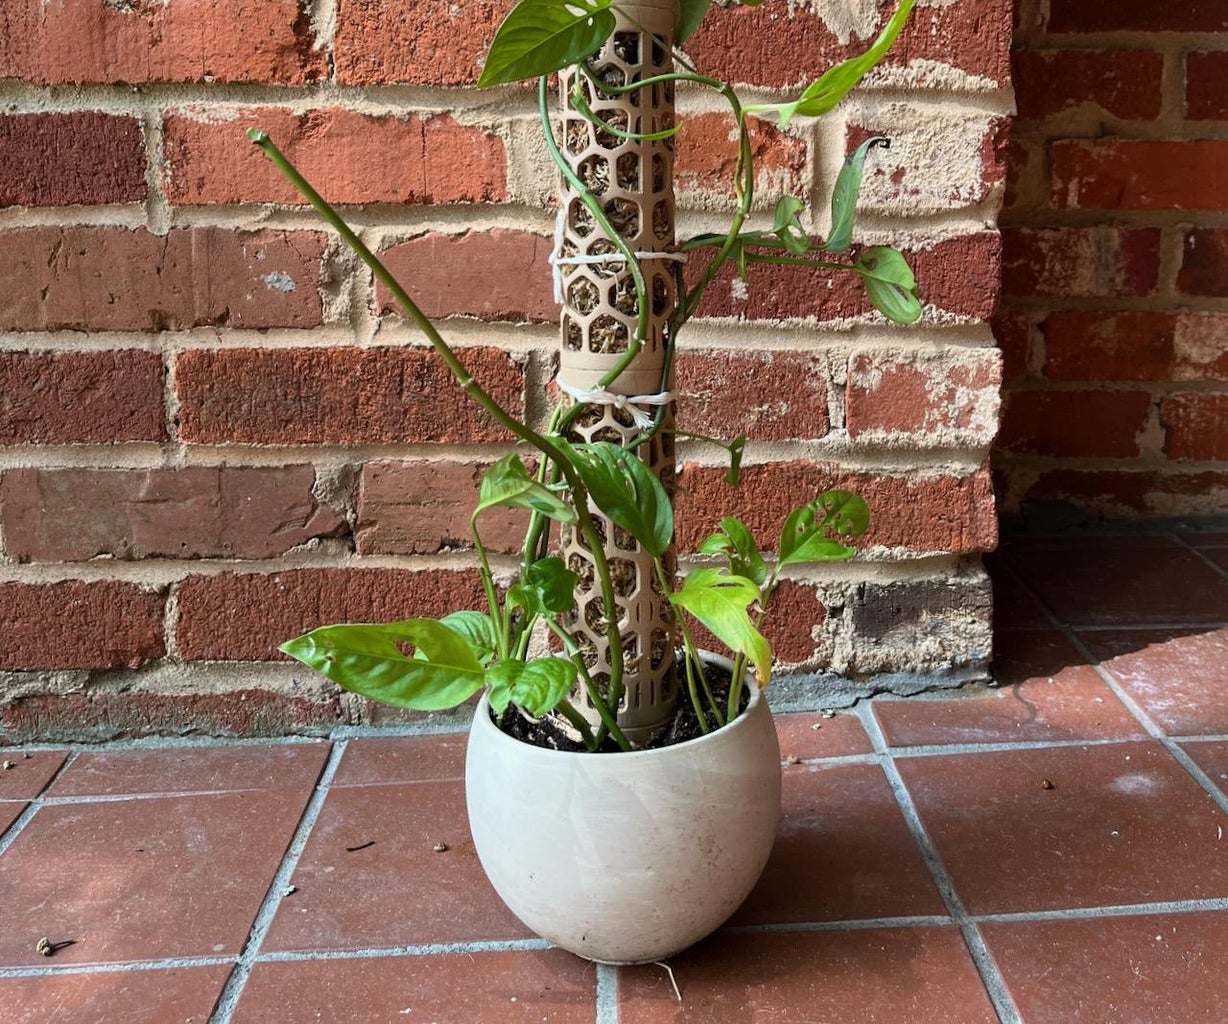
Place your moss pole into your plant's pot.
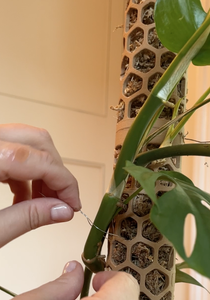
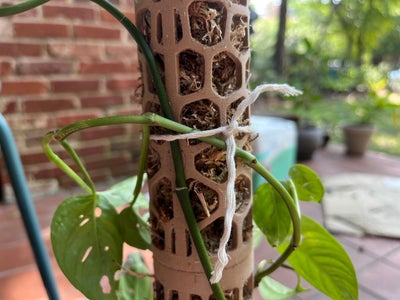
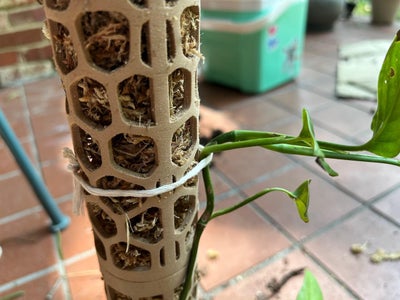
Using wire or cord, attach your plant's vine or stem to the pole. Make sure root nodes are near the mossy areas to encourage root attachment. Mist these areas with a sprayer to further encourage rooting.
Step 6: Admire Your Handiwork
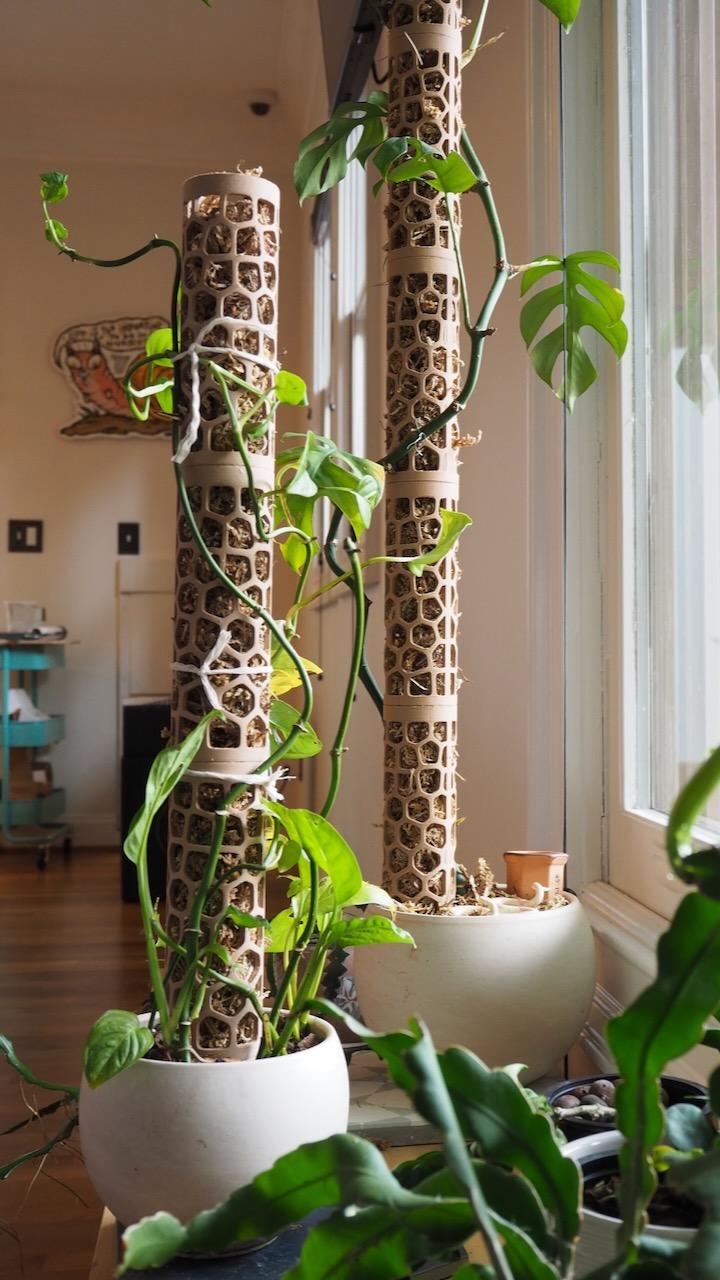
The finally step of any project is to admire your work. Place your newly supported plant in an (appropriately) sunny spot and enjoy!


4 Comments
10 hours ago
Ohhhh these are beautiful! I have chicken wire and moss to build poles but I need to try this too :D
Reply 4 hours ago
Thanks! That can be a great way to build a moss pole, too, but it's always fun to have some variety, especially when you have a lot of plants.
12 hours ago
Cool idea. I have been meaning to try growing a vanilla plant indoors and I think this may be good for that.
Reply 11 hours ago
Thanks! If you do it please share pics!