
Introduction: Make a Rainbow Pendulum Snake With Tinkercad.


Tinkercad is an amazing application to do 3D design, but not only; today, I'm going to use Sim Lab, an option that can be used on Tinkercad. For that, I made a pendulum snake and I'm going to show you step by step how i did it, and to make it more mesmerizing; I colored it with the colors of the rainbow. So let's start.
(I made 2 designs: with 6 and with 10 because my pc takes too long with 10, it's faster with 6. This tutorial is for the 10, but it is the same for the 6, just use logic).
Supplies


You need Tinkercad.
- Open tinkercad.com on your browser.
- Then you need to login or sign up.
and you need time and imagination.
Step 1: New


First press in create then 3D design.
When you arrive in the workplane:
- Press in Settings.
- Change width and length to 800.
We will use a big platform here.
Step 2: Tube


- Generate a tube.
- Then rotate 90°.
- Put X: 15.35, Y: 20, Z: 20.26.
- Generate a box.
- Make it as a hole.
- Put X: 5.38, Y: 28.
- Then align with the tube and group.
You need 20 of them here.
Step 3: Tube2


Generate a cylinder with X: 45; Y: 17; Z: 19. you need 10 of them, then add 2 of the tube before, both in each side of the cylinder and group.
Step 4: Cylinder


- Generate a cylinder.
- Put X and Y to 3.32; Z: 50.
- Duplicate 9 times.
Now you need to put Z of them to the following order: 205; 218; 233; 248; 266; 285; 307; 331; 358; 388. And duplicate all.
Step 5: Sphere


You need 2 different spheres, so put 2 different colors for each.
First sphere:
- Generate a sphere.
- Put X, Y, and Z to 12.17.
- You need 20 of them.
Second sphere:
- Generate a sphere.
- Put X, Y and Z to 9.95.
- You need 20 of them too.
Step 6: Box


You need 2 different boxes, here the color is not important because they are very different.
First box:
- Generate a box.
- Put X: 73; Y: 22.12; Z: 6.64.
- You need 10 of them.
Second box:
- Generate a box.
- Put X: 20; Y: 5; Z: 420.
- Then duplicate.
Step 7: Stem


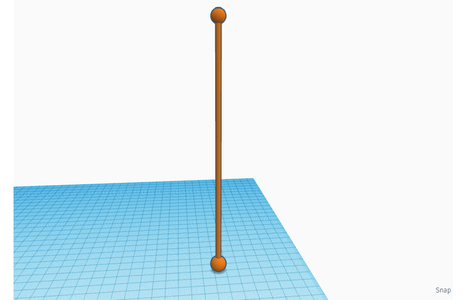

The stem will be use to hold the "balls". Here, those are not balls because i tried so much things and it didn't work. Only box work normally so we are going to use the 10 boxes earlier as balls.
- Take the cylinder in Step 4.
- Add the first sphere, align and group.
- Add the second sphere, align and group.
Repeat those steps to all cylinders.
Step 8: Assemblage


Now we will assemble a first time:
- First pull up the 10 boxes of 6.87.
- Then, add a Stem to the right; starting from the end, add 2.77 to the right and 4.97 in front.
- Add an another Stem and starting from the end again, add 58.62 to the right and 4.97 in front.
- Finally group all.
Repeat those steps to the 10 boxes, then change colors with rainbow colors.
Step 9: Alignment


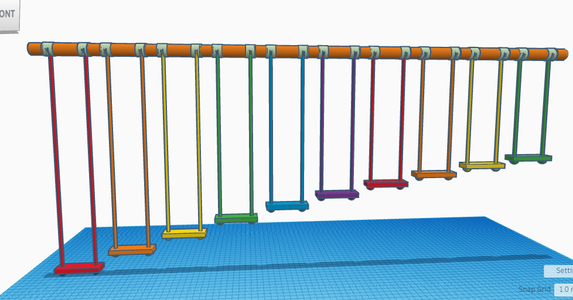
You need to add one of the shape in step 3 to each of the shape before. Then align all. And add a cylinder between 2 forms.
Step 10: Assemblage


For the last step of the design, add the second boxes of the step 6, in each side of the shape. Then group it with the shapes at the top. And your design is done.
Step 11: Sim Lab


Now we are going to animate it. As I said in the introduction, we are going to use Sim Lab. So push it, then you are in the home screen, so select the shape and change material between ice, steel or plastic. With ice or steel, your animation lasts a long time, but the style and the color aren't the same; and with plastic, your design is more colorful; so you choose according to your taste. Then put the top and the two box static and the pendulums dynamic. Finally, press in the play button and let yourself be hypnotized and amazed with the show.
I hope you have enjoyed this instructable. Bye ☺.
Step 12: Video1
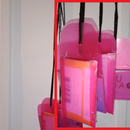
Plastic:
Step 13: Video2
Ice:
Step 14: Video3
Steel:

This is an entry in the
Colors of the Rainbow Contest


Comments